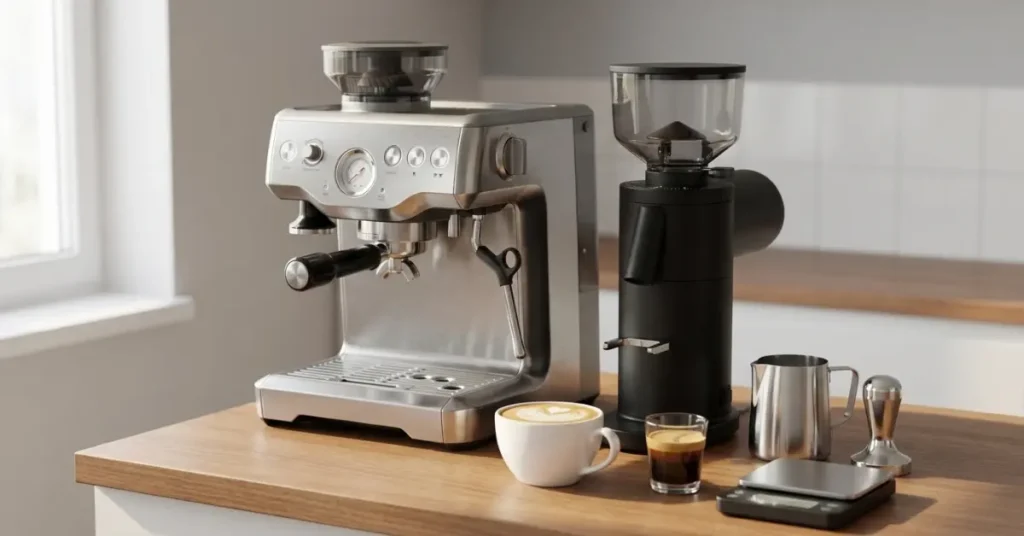
Semi-automatic espresso machines deliver café-quality espresso at home, but choosing the wrong setup—or mismatching your machine with an inadequate grinder—leads to expensive upgrade regret that experienced home baristas see beginners make every single day. This guide cuts through the confusion by addressing the real questions beginners and enthusiasts ask: which machine-plus-grinder combo actually works for your budget, how to maintain your investment without voiding warranties, and why your grinder choice matters more than you think.
Top Picks
THE BEST BEGINNER ESPRESSO SETUP:
Breville Bambino Plus + Eureka Mignon Crono
ANOTHER GREAT BEGINNER SETUP:
Gaggia Classic Pro + Baratza Sette
BEST DUAL BOILER FOR MILK DRINK LOVERS:
Breville Dual Boiler + Eureka Mignon Specialita
THE BEST PROSUMER ESPRESSO SETUP:
Rancilio Silvia Pro X + Niche Zero
Why Semi-Automatic Espresso Machines (and the Grinder) Matter
What Is a Semi-Automatic Espresso Machine?

A semi-automatic espresso machine uses an electric pump to force hot water through finely ground coffee at around 9 bars of pressure, while you control the start and stop of the extraction. Unlike fully automatic or superautomatic machines that grind, dose, and brew at the push of a button, semi-automatics require you to grind separately, tamp the coffee into a portafilter, and manually initiate the shot. This hands-on control is exactly what professional baristas prefer because it allows precise adjustments to extraction time, temperature, and technique.
Semi-Automatic vs Automatic vs Superautomatic vs Manual
Semi-automatic machines sit between manual lever machines (which require physical pressure from the user) and fully automatic machines (which stop the shot automatically at a preset volume). Superautomatics handle everything from grinding to milk frothing with zero manual input, trading ultimate convenience for less control over each variable. Semi-automatics strike the balance: they automate pump pressure and temperature stability while leaving you in charge of grind size, dose, distribution, tamping, and shot timing—the core factors that define espresso quality.
How Semi-Automatic Machines Fit Home Use (Milk Drinks, Straight Espresso, Guests)
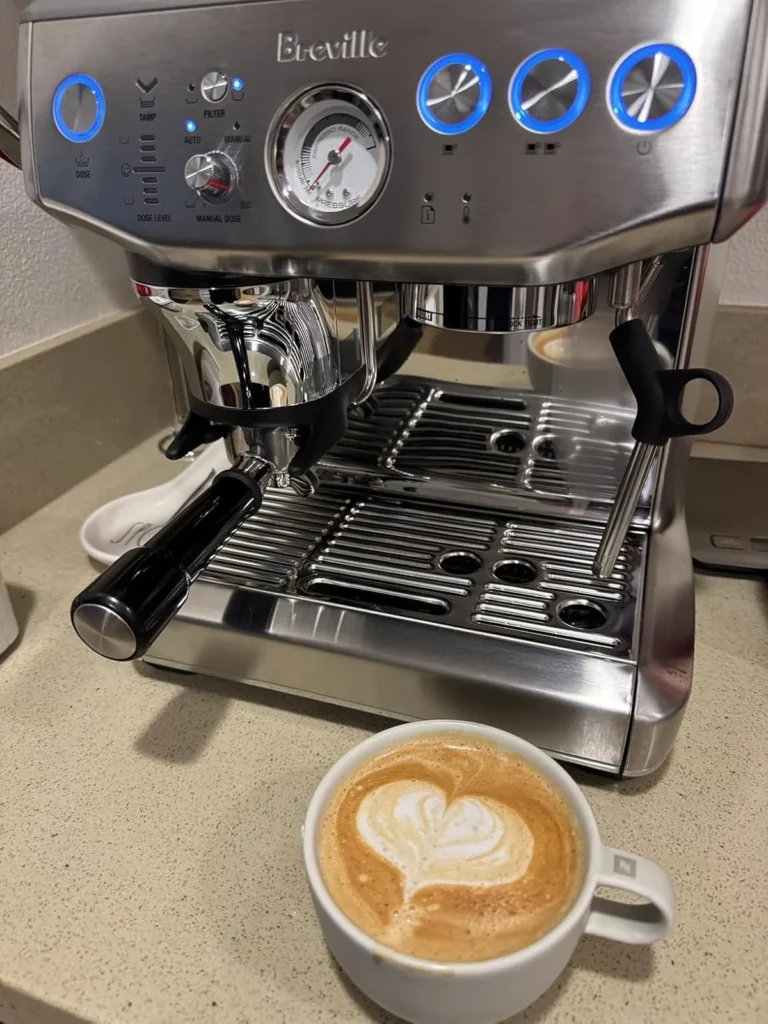
Semi-automatic machines excel at home for both straight espresso and milk-based drinks like lattes and cappuccinos. Single-boiler models require brief wait times between brewing and steaming, while dual-boiler or heat-exchanger machines let you pull shots and steam milk simultaneously—ideal if you’re making back-to-back drinks for guests or family. Most home barista discussions about semi-automatics center on milk drink workflows, since steaming technique and boiler recovery time become critical when you’re making multiple lattes each morning.
The Grinder-First Truth
“Do I Spend More on the Grinder or the Machine?”
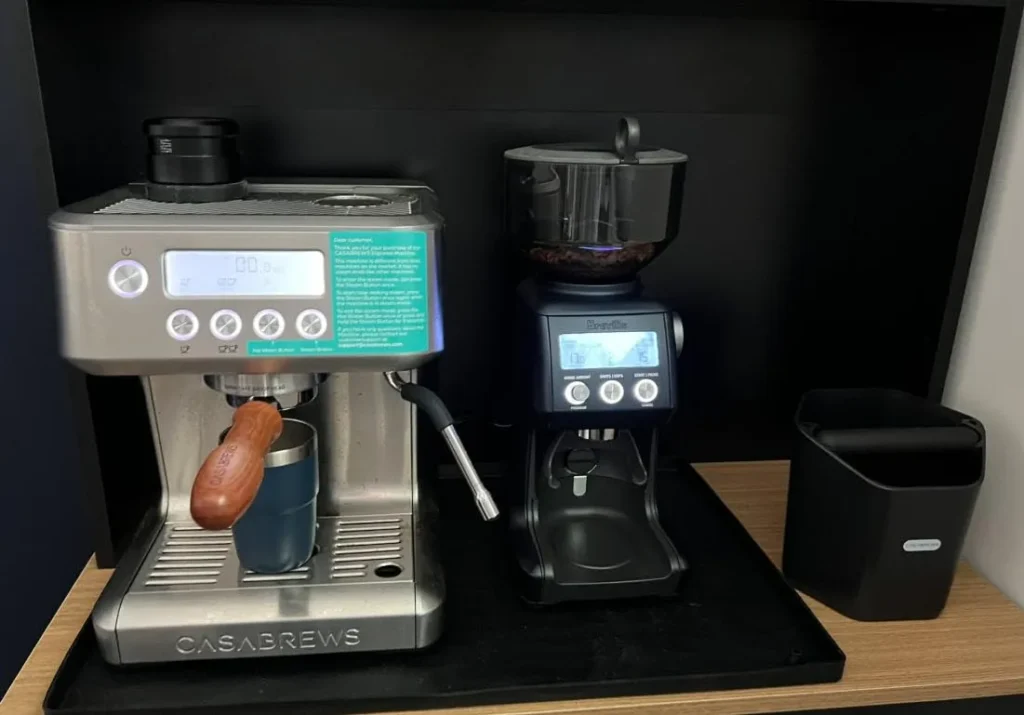
An espresso-capable grinder affects shot quality more dramatically than the machine itself, yet beginners routinely overspend on machines and underinvest in grinders. A $200 machine paired with a $400 grinder will consistently outperform a $400 machine with a $200 grinder because espresso extraction depends on grind uniformity, stepless micro-adjustments, and low retention—all grinder characteristics. When budgeting $600–$800 total, seasoned home baristas recommend allocating roughly equal amounts or even favoring the grinder slightly.
Why Weak Built‑In Grinders Cause Upgrade Regret
All-in-one machines with integrated grinders—like the popular Breville Barista Express—create a common upgrade trap. The built-in grinder becomes the limiting factor within months as your palate develops and you crave better shot quality. At that point, you’re forced to buy a standalone grinder, rendering the built-in unit dead weight and making the original purchase essentially wasted money. Experienced home baristas repeatedly advise beginners to either buy a separate machine-plus-grinder from the start or accept that an all-in-one is a short-term learning platform, not a long-term solution.
Water Quality and Scale
Improper water causes two catastrophic problems: poor espresso flavor and scale buildup that clogs boilers, voids warranties, and shortens machine lifespan. Hard tap water deposits calcium inside heating elements and group heads, while overly soft or distilled water can actually prevent some machines from turning on and taste flat in the cup. The approved solution involves either Third Wave Water mineral packets added to distilled or reverse-osmosis water, or DIY water recipes that balance minerals for flavor while staying “soft enough to be scale-free”. Using correct water from day one eliminates the need for frequent descaling—a process that, when done incorrectly, can migrate scale chunks into valves and pumps, causing the exact pressure and flow problems described in countless troubleshooting threads.
How to Choose the Best Semi-Automatic Espresso Machine
Key Features That Actually Affect Your Shots
Boiler Types (Single, Heat‑Exchanger, Dual Boiler) for Milk Drinks
Single-boiler machines heat one reservoir of water that switches between brewing temperature (around 200°F) and steaming temperature (around 265°F), requiring a brief cooldown or heat-up pause between pulling shots and frothing milk. Heat-exchanger (HX) machines keep the boiler hot for steam while passing brew water through a tube inside that boiler, allowing near-simultaneous brewing and steaming but often requiring “temperature surfing” (flushing water to dial in brew temp). Dual-boiler machines dedicate one boiler to brewing and one to steam, delivering rock-solid temperature consistency and true simultaneous operation—the gold standard for milk drink lovers who make multiple lattes back-to-back.
PID, Temperature Stability, and “9 Bar at the Group”
A PID (Proportional-Integral-Derivative) controller maintains brew water at a precise target temperature, eliminating the temperature swings that cause sour or bitter shots on non-PID machines. Temperature stability directly impacts extraction evenness: consistent temps mean balanced flavor, while fluctuations extract unevenly and taste harsh. Factory pump pressure should deliver 9 bars at the group head (not at the pump), since over-pressurized machines (historically 12+ bars) produce bitter, over-extracted espresso. Newer models like the updated Gaggia Classic Evo Pro now ship with 9-bar pressure by default, a long-overdue industry correction.
Steam Power, Recovery Time, and Back‑to‑Back Milk Drinks
Steam wand power and boiler size determine how quickly you can texture milk and how soon the machine recovers for the next drink. Single-boiler machines with small reservoirs may need 30–60 seconds to reheat after steaming, while dual-boiler setups keep the steam boiler at full pressure continuously. For households making two or three lattes in quick succession, recovery time becomes a daily pain point—one of the main reasons experienced users upgrade from single-boiler to dual-boiler configurations.
Reliability, Repairability, and Real Ownership Costs
Appliance Style vs “Tanky” Classics (e.g., Gaggia Classic‑Style Machines)
Appliance-style machines like Breville models emphasize user-friendly features, compact footprints, and modern aesthetics, but some components are proprietary and harder to service long-term. “Tanky” classics like the Gaggia Classic Pro use commercial-standard 58mm portafilters, boiler-based brewing (not thermoblock), and simpler construction that home users can repair or modify themselves. This philosophical divide matters for ownership longevity: appliance machines may last 5–7 years with care, while a well-maintained Gaggia-style machine can run 10+ years and accept aftermarket parts, mods, and upgrades.
Availability of Parts, Mods, and Service (E61, Group Head Rebuilds)
E61 group head machines (a specific commercial-grade design used in prosumer models) have vast aftermarket support, detailed teardown videos, and standardized gaskets, screens, and seals available worldwide. This modular repairability means you can replace worn group gaskets, perform camshaft lubrication, and rebuild the entire brew group at home with basic tools and food-safe lubricant. Machines with strong modding communities—Gaggia Classic Pro, Rancilio Silvia—offer PID kits, pressure adjustment springs, and flow-control modifications that extend capability and lifespan far beyond stock configuration.
What Users Think They Need vs What They Actually Use
All‑In‑One Machines vs Separate Grinder Setups
Beginners often assume an all-in-one machine simplifies the learning curve and saves counter space, but the opposite frequently happens. Once you develop basic espresso skills, the built-in grinder’s lack of stepless adjustment or insufficient burr quality becomes glaringly obvious, forcing either an external grinder purchase (rendering the integrated unit useless) or living with mediocre shots indefinitely. Separate setups cost slightly more upfront but preserve upgrade flexibility: replace or improve the grinder independently without touching the machine.
Why Most Users Abandon the Built‑In Grinder Later
The Breville Barista Express illustrates this pattern perfectly: the machine’s espresso capability is solid, but the integrated grinder’s stepped adjustment and smaller burrs limit dialing-in precision. Within 3–6 months, users who care about shot quality buy a Eureka Mignon, Baratza Sette, or similar dedicated espresso grinder and never use the built-in unit again—a $100+ component gathering dust. If you know you’ll chase better espresso, buying separately from day one saves money and frustration.
Best Semi-Automatic Espresso Machines in 2026 (By Real Use Case)
Best Overall Semi-Automatic Espresso Machine for Most Homes
Who It’s For (Drinks, Budget, Skill Level)


The Breville (Sage) Barista Pro or Barista Touch serves intermediate home users who make 2–4 milk drinks daily, value modern conveniences like fast heat-up and intuitive controls, and have $700–$900 to invest in the machine alone (grinder separate). These models balance hands-on espresso learning with automated assists—volumetric dosing buttons, PID temperature control, and powerful steam wands—without fully automating the craft away.
Key Specs (Boiler, PID, Footprint, Steam Power)
Breville’s mid-range machines use thermocoil heating (faster than boilers, more stable than basic thermoblocks), integrated PID, and three-second heat-up times that eliminate lengthy warm-up waits. The 54mm portafilters are smaller than commercial 58mm but perfectly adequate for home use, and steam wand performance rivals entry-level commercial machines. Footprints remain apartment-friendly (typically 12–14 inches wide), and build quality balances durability with reasonable pricing.
Pros, Cons, and Best Grinder Pairings
Pros: Fast workflow, built-in grinder option (though many skip it), strong community support, widely available parts. Cons: Proprietary components complicate DIY repairs, smaller portafilter limits accessory compatibility, and descaling risks if water quality is ignored. Pair with an Eureka Mignon Specialita (stepless, 55mm burrs, low retention) or Baratza Sette 270 (macro/micro adjustment, fast) for a well-matched $1,200–$1,400 total setup.
Best Budget Semi-Automatic Setup for Beginners
Under ~$600: Machine + Espresso‑Capable Grinder Combo


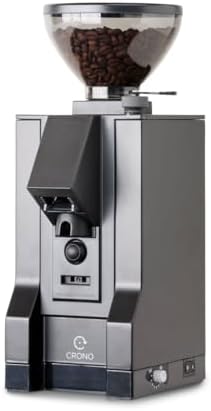

The Breville Bambino or Bambino Plus (around $300–$400) paired with an Eureka Mignon Crono with espresso burrs or a Baratza Encore ESP (around $200–$300) hits the $600 total budget sweet spot that experienced home baristas consistently recommend. The Bambino delivers preset dosing, fast heat-up, PID control, and automatic milk frothing (on the Plus model), making it beginner-friendly without sacrificing shot quality. The compact 54mm portafilter and thermoset heating system punch above the price point.
Should I Just Buy a Cheap All‑In‑One?
No—cheap all-in-ones under $400 typically pair a mediocre grinder with a mediocre machine, creating a mediocre experience that discourages learning. The Bambino plus separate grinder costs the same but gives you espresso-capable grinding and a repairable, upgrade-friendly machine. If absolute simplicity matters more than quality, an all-in-one provides convenience, but if you genuinely care about espresso, separate components win every time.
Best Beginner Semi-Automatic Setup for Milk Drinks
I Mostly Drink Lattes and Cappuccinos—What Do I Buy?
Milk drink lovers should prioritize steam power and either fast boiler recovery (single-boiler) or simultaneous operation (dual-boiler). The Breville Bambino Plus automates milk frothing via temperature sensors, ideal for beginners intimidated by manual steaming. The Gaggia Classic Pro, though requiring manual steaming technique, offers a larger boiler and more powerful steam (once you learn to use it) for the same price range. Both machines make excellent lattes; choose Bambino Plus for ease or Gaggia Classic Pro for long-term durability and moddability.
Workflow: Brew, Steam, and Not Losing Pressure
Single-boiler workflow: pull shot first, immediately switch to steam mode, purge briefly, texture milk, then run a cooling flush before the next shot. This sequence minimizes wait time and prevents over-temperature shots from residual steam heat. If pressure drops or steam weakens mid-session, the boiler hasn’t fully recovered—wait 30 seconds before the next drink or consider a dual-boiler upgrade if this becomes a daily annoyance.
Best Compact / Small‑Kitchen Semi-Automatic Machine
Footprint, Noise, and Apartment‑Friendly Use
The Breville Bambino measures just 7.7 inches wide, fitting under cabinets and into tight counters where larger machines won’t. Thermojet heating runs quieter than vibratory-pump machines at full throttle, and fast heat-up (3 seconds) means you don’t leave it on all day, reducing counter clutter. For ultra-compact setups, skip machines with built-in grinders entirely—they add width and height without adding value if you’re buying a separate grinder anyway.
Grinder Suggestions When Counter Space Is Tight
The Eureka Mignon Notte or Crono (8–9 inches tall, 4.7 inches wide) tucks into corners and fits under wall cabinets, while delivering espresso-grade grinding with 55mm flat burrs. The Baratza Encore ESP (similarly compact) uses the same footprint as the standard Encore but adds espresso-focused burrs and finer adjustment range. Single-dosing grinders like the Niche Zero (though pricier at $620+) minimize counter mess via zero-retention designs, ideal for small kitchens.
Best Semi-Automatic Espresso Machine With a Built‑In Grinder
Who Should Actually Buy an All‑In‑One (And Who Should Not)
All-in-ones make sense for users who prioritize convenience, have severe space constraints, and accept that the grinder will become the limiting factor within 6–12 months. If you’re certain espresso is a passing phase, or if you value simplicity above shot quality, machines like the Breville Barista Express Impress deliver respectable results in one package. However, if you’re genuinely passionate about espresso or plan to improve your skills, buying separate components prevents expensive upgrade regret.
Will I Outgrow the Built‑In Grinder and Regret It?
Yes, probably. Built-in grinders on sub-$700 all-in-ones use stepped adjustment (limiting fine-tuning), smaller burrs (reducing grind uniformity), and higher retention (wasting coffee and mixing fresh/stale grounds). Within months, you’ll notice the grinder can’t dial in certain beans or deliver the consistency you’re now capable of tasting. At that point, you’ll buy a $300+ standalone grinder and never touch the built-in unit again—essentially wasting the purchase.
Best Semi-Automatic Espresso Machine for Tinkerers and Modders
Bambino vs Infuser vs Gaggia Classic (Durability, Mods, Repairability)

The Gaggia Classic Pro dominates modding discussions due to its simple boiler design, widely available aftermarket parts, and active community sharing PID kits, OPV (over-pressure valve) springs, and flow-control mods. The Rancilio Silvia (slightly pricier) offers similar modularity with a larger brass boiler and commercial-grade build. Breville machines (Bambino, Infuser) use proprietary thermoblocks and electronics that discourage DIY modifications, though basic maintenance (descaling, gasket replacement) remains user-accessible.
PID Mods, Pressure Tweaks, and Community Support
Installing an aftermarket PID on a Gaggia Classic Pro ($100–$150 in parts) transforms temperature consistency, effectively upgrading it to compete with $800+ machines. Adjusting the OPV spring to achieve true 9-bar pressure at the group (a 10-minute mod) eliminates bitterness and improves clarity. Home espresso forums and YouTube channels provide step-by-step guides, troubleshooting help, and encouragement for these mods, while Breville users typically focus on stock usage and warranty preservation.
Best Dual Boiler Semi-Automatic for Milk Drink Lovers
Simultaneous Brew + Steam vs Single Boiler “Wait Time”
Dual boilers eliminate the workflow compromise inherent in single-boiler machines: no more waiting for temperature changes, no more choosing between back-to-back shots or immediate milk steaming. If you make 4+ milk drinks daily, serve guests regularly, or value café-speed workflows, the time savings and consistency justify the $1,200–$2,000 price jump. Machines like the Breville (Sage) Dual Boiler or Lelit Elizabeth (featuring PID for both boilers) deliver prosumer performance at semi-prosumer prices.
Is a Dual Boiler Worth the Jump for You?
If you’re a casual espresso drinker making 1–2 drinks per day and don’t mind waiting 30 seconds between brewing and steaming, a single boiler suffices. But if you’re the household barista serving multiple people, geek out on temperature profiling, or hate inefficient workflows, a dual boiler is “absolutely worth it” according to experienced users. The performance difference is noticeable every single day, making it one of the few upgrades that genuinely improve your quality of life rather than just incremental shot quality.
Best Prosumer / E61‑Style Semi-Automatic Espresso Machine
The Rancilio Silvia Pro X represents the sweet spot for home baristas ready to graduate from entry-level machines without jumping to $3,000+ commercial equipment. This dual-boiler machine delivers simultaneous brewing and steaming, dual PID temperature control for both boilers, and Rancilio’s legendary commercial-grade build quality in a compact home-friendly package. The 58mm commercial portafilter, stainless steel construction, and serviceable design mean this machine can last 15+ years with proper maintenance.

- Dual Boiler: A 1-liter steam boiler and 300ml brew boiler offer simultaneous brewing and steaming.
- Steam, Optional: A focus on brew temp stability keeps the steam optional, only at pressure when you need it.
- PID Control: Dedicated brew and steam circuit PIDs offer excellent temperature management, and can be adjusted to-the-de…
E61 Group, Backflushing, and Group Head Rebuilds
E61 group heads—found on machines like the Profitec Pro 500 and Rocket Appartamento represent commercial grade engineering scaled for home use. These thermosyphon heated groups maintain temperature stability through passive convection and require specific maintenance: water backflush daily (30 seconds), detergent backflush every 6–12 weeks, and annual group gasket/screen replacement. Home baristas pulling 3–4 shots daily should perform a detergent backflush every 4–6 months and lubricate the camshaft with food-safe Molykote compound after every third detergent backflush.

- Rocket Design – A flashy update to Rocket’s (already showstopping) design, the Appartamento will draw stares from everyo…
- Heat Exchange Boiler – A 1.8-liter heat exchange steam boiler allows you to brew espresso and froth milk at the same tim…
- Heated Group Head – A small flow of water off the boiler keeps your machine’s group head warm for more consistent shot t…
Who Should Jump to Prosumer and Who Should Wait
Prosumer E61 machines ($1,500–$3,000) suit experienced users who’ve mastered dialing in, understand water chemistry, and want commercial durability and repairability in a home package. If you’re still learning espresso basics, the added complexity and maintenance requirements (plus the higher price) outweigh the benefits—start with a Bambino or Gaggia Classic Pro and upgrade once you’ve hit their limitations. E61 machines reward skill and knowledge; beginners often can’t taste the difference they’re paying for.
Semi-Automatic Espresso Machine Comparison Tables
Machine Feature Comparison Table
| Model | Boiler Type | PID | Built‑In Grinder | Best For | Approx. Price Band | Footprint / Weight | Notable Pros | Notable Cons |
|---|---|---|---|---|---|---|---|---|
| Breville Bambino Plus | Single (Thermojet) | Yes | No | Beginners, compact kitchens | $400–$500 | 7.7″ W, 10 lbs | Fastest heat-up, auto milk frothing, tiny footprint | 54mm portafilter, limited moddability |
| Gaggia Classic Pro | Single (Boiler) | No (moddable) | No | Tinkerers, durability focus | $450–$550 | 9.2″ W, 17 lbs | 58mm portafilter, huge mod community, repairable | Requires temp surfing, no PID stock |
| Breville Barista Pro | Single (Thermocoil) | Yes | Optional | Intermediate home users | $700–$900 | 13″ W, 18 lbs | Fast workflow, intuitive controls, good steam | Proprietary parts, smaller portafilter |
| Breville Barista Express Impress | Single (Thermocoil) | Yes | Yes | Convenience-first beginners | $600–$800 | 15″ W, 24 lbs | Assisted tamping, integrated grinder | Built-in grinder creates upgrade regret |
| Breville Dual Boiler | Dual Boiler | Yes (both) | No | Serious milk drink lovers | $1,600–$1,800 | 16″ W, 29 lbs | Simultaneous brew/steam, dual PIDs, powerful | Large footprint, higher price |
| Rancilio Silvia Pro X | Dual Boiler | Yes (both) | No | Prosumer upgrade, serious home baristas | $1,800–$2,000 | 11.4″ W, 33 lbs | Dual boiler with dual PID, commercial-grade build, 58mm portafilter | Higher price, requires counter space |
Beginner & Budget Setup Table (Machine + Grinder)
| Budget (Approx.) | Machine | Grinder | Best For | Why This Pairing Works | Upgrade Path Notes |
|---|---|---|---|---|---|
| $500–$600 | Breville Bambino | Eureka Mignon Crono (espresso burrs) | Space-limited beginners | Bambino’s ease + Crono’s stepless adjustment cover fundamentals without overlap | Upgrade machine later; grinder lasts years |
| $700–$900 | Gaggia Classic Pro | Baratza Sette 270 | Tinkerers, milk drinks | Classic’s moddability + Sette’s macro/micro adjustment grow with your skills | PID mod machine; grinder needs no upgrade |
| $900–$1,200 | Breville Barista Pro | Eureka Mignon Specialita | Intermediate users wanting speed | Pro’s fast workflow + Specialita’s low retention and quiet operation suit daily use | Potential dual-boiler upgrade later |
| $1,800–$2,200 | Rancilio Silvia Pro X | Niche Zero | Enthusiasts, prosumer upgrade | Silvia Pro X dual boiler performance + Niche’s zero-retention single dosing enable ultimate control | End-game setup for serious home baristas |
Milk‑Drink Lover Setup Table
| Use Case | Machine Type | Boiler Setup | Recommended Grinder | Steam Power Notes | Apartment‑Friendly? |
|---|---|---|---|---|---|
| 1–2 lattes daily, beginner | Breville Bambino Plus | Single (Thermojet) | Eureka Mignon Crono | Auto-frothing simplifies learning; 30s recovery | Yes—ultra compact, quiet |
| 2–4 cappuccinos daily, learning manual steaming | Gaggia Classic Pro | Single (Boiler) | Baratza Sette 270 | Powerful steam once mastered; 60s recovery | Moderate—louder pump, larger |
| 4+ milk drinks daily, experienced | Breville Dual Boiler | Dual Boiler | Eureka Mignon Specialita | Continuous steam pressure; zero recovery wait | No—larger footprint, needs space |
| Serving guests, back-to-back drinks | Lelit Elizabeth (or similar dual boiler) | Dual Boiler | Niche Zero or DF64 | Commercial-level steam power and recovery | Moderate—prosumer size but manageable |
Grinder-First Budget Strategy (Stop Upgrade Regret)
I Have $600–$800: How Do I Split It?
Grinder‑Heavy vs Machine‑Heavy Allocations
Experienced home baristas recommend allocating 50–60% of your budget to the grinder, especially at lower total budgets. A $350 grinder paired with a $250 machine (like a used or sale-price Bambino) outperforms a $600 machine with a $100 grinder every single time. Grind quality determines extraction potential; a $200 machine can’t rescue poor grinding, but a $400 grinder makes even basic machines shine. Only once your budget exceeds $1,500 total do machine features (dual boilers, E61 groups, advanced PIDs) begin to matter as much as grinder quality.
Most Recommend
For $600 total: Breville Bambino ($300–$350) + Eureka Mignon Crono with espresso burrs ($250–$300).
For $800 total: Gaggia Classic Pro ($450) + Baratza Sette 270 ($350–$400).
For $1,200 total: Breville Barista Pro ($700) + Eureka Mignon Specialita ($500) or flip to a used mid-tier machine ($400) with a Niche Zero ($620).
These pairings appear in r/espresso starter threads weekly because they balance capability, repairability, and upgrade flexibility.
Hidden Deal Breaker: Grinder Mismatch
Why Entry‑Level Grinders Ruin Expensive Machines
A $1,000 machine paired with a blade grinder or entry-level burr grinder (Encore, Capresso Infinity) produces undrinkable espresso because grind uniformity and adjustment precision matter more than pump pressure or boiler type. Espresso requires grinds within a narrow particle-size range (roughly 200–400 microns); entry-level grinders produce wide distributions with too many fines (bitter) and boulders (sour), making consistent extraction impossible. Experienced users call this “polishing a turd”—you’re wasting the machine’s potential on mediocre grinds.
Espresso‑Capable Grinder Features (Stepless, Fine Adjustment, Low Retention)
True espresso grinders offer stepless adjustment (infinite grind sizes between presets) because dialing in often requires tiny changes that stepped grinders can’t accommodate. Fine adjustment range means the grinder can go fine enough for espresso without stalling; many drip-focused grinders bottom out too coarse. Low retention (under 1 gram) prevents old grounds mixing with fresh coffee, ensuring what you dose is what you brew and reducing waste. Grinders lacking these features—including most built-in grinders on all-in-one machines—limit your espresso ceiling.
Built‑In Grinder Machines: Who They’re Really For
Convenience vs Longevity (Outgrowing the Grinder)
Built-in grinders excel at one thing: reducing decision paralysis for absolute beginners who find separate grinder research overwhelming. If you’re testing whether espresso is a hobby you’ll pursue or a passing interest, an all-in-one minimizes upfront investment and learning curve. However, if you have any inkling you’ll care about shot quality within 6 months, separate components prevent expensive re-buying later.
When an All‑In‑One Actually Makes Sense
Buy an all-in-one if: you’re 100% certain you want espresso convenience without the craft, you have zero counter space for separate units, you’re buying for an office or casual use setting, or you plan to resell within a year. Don’t buy an all-in-one if: you already care about coffee quality, you’ve researched grinders at all, you make multiple drinks daily, or you plan to keep the machine 3+ years.
Maintenance Without Panic: Descaling, Backflushing, and Water
Descaling vs Backflushing (What Most People Confuse)
Cleaning Coffee Oils (Backflush / Detergent Backflush)
Backflushing removes coffee oils, residue, and grounds from the group head, shower screen, and three-way valve using either plain water (daily quick rinse) or espresso-specific detergent (every 4–12 weeks depending on usage). You insert a blind basket (no holes) with detergent into the portafilter, run the pump for 10 seconds to build pressure, release, and repeat 5–10 times until water runs clear. This process has nothing to do with scale or mineral buildup—it’s purely cleaning coffee residue that would otherwise turn rancid.
Removing Scale (Descaling) and Warranty Risks
Descaling removes calcium and mineral deposits from boilers, heating elements, and internal plumbing using acidic solutions (citric acid, proprietary descalers). Crucially, many manufacturers void warranties if you descale improperly or use unapproved chemicals, and aggressive descaling can dislodge scale chunks that migrate into pumps and valves, causing the exact pressure and flow problems users panic about. If you use properly mineralized water from the start (Third Wave Water, DIY recipes), descaling becomes unnecessary for years or entirely avoidable.
Water Recipes, Hardness, and Scale‑Free Ownership
“Soft Enough to Be Scale Free”: What That Really Means
Water “soft enough to be scale-free” typically means total dissolved solids (TDS) under 100 ppm with minimal calcium and magnesium hardness, preventing scale formation while retaining enough minerals for proper espresso extraction and taste. Pure distilled or reverse-osmosis water is too soft (can prevent machines from operating and tastes flat), while hard tap water (150+ ppm TDS) causes rapid scale buildup. The solution: start with distilled or RO water and add calibrated mineral packets that balance flavor with scale prevention.
DIY Water Recipes vs Filters vs Bottled Options
Third Wave Water packets (available for 1-gallon, 2-liter, or 5-gallon batches) provide foolproof water by adding precise minerals to distilled or RO water, meeting Specialty Coffee Association guidelines without guesswork. DIY water recipes use food-grade minerals like magnesium sulfate and sodium bicarbonate for cost savings but require scales and careful mixing. Standard water filters (Brita, PUR) don’t remove enough hardness to prevent scale; Zero Water filters produce near-distilled water suitable for remineralization.
E61 and Prosumer Maintenance Schedule
How Often to Backflush, Detergent Backflush, and Descale (or Not)
For home E61 machines with 3–4 shots daily: water backflush for 30 seconds at end of each use day, detergent backflush every 4–6 months, replace group gasket and shower screen annually. Commercial or high-volume home use (8+ shots daily): detergent backflush every 6–12 weeks. Descaling frequency depends entirely on water quality—proper water eliminates descaling need; hard tap water may require descaling every 3–6 months (check manufacturer guidelines to avoid voiding warranty).
Group Head Rebuilds, Gaskets, and Screens
E61 group head gaskets (the rubber seal between portafilter and group) wear out from heat cycling and should be replaced when shots leak around the portafilter edge, typically every 12–24 months. Shower screens (the metal plate dispersing water over the puck) accumulate coffee oils and should be removed and soaked in detergent every 3–6 months, replaced if pitting or warping occurs. Full group rebuilds (disassembling the cam lever mechanism, replacing all seals, lubricating) are 3–5 year maintenance tasks best tackled with video guides and patience.
Common Maintenance Questions
Did I Break My Machine by Descaling Wrong?
Probably not permanently, but you may have dislodged scale chunks that are now blocking the shower screen, three-way valve, or restricting flow somewhere. First steps: remove and clean the shower screen and check the dispersion plate for white calcium deposits. Run a blank shot (no portafilter) to flush the group and observe flow—if it’s restricted, run several more blank shots to clear debris. If pressure gauge reads incorrectly or erratically after descaling, air may be trapped in the system; running the machine through full heating cycles and pulling multiple shots usually purges airlocks.
Can I Backflush My Machine or Will It Damage the Valve?
Only backflush machines equipped with three-way solenoid valves, which release pressure after shots—virtually all semi-automatic portafilter machines have this. Do not attempt to backflush machines without three-way valves (some cheap models, most manual lever machines) as pressure buildup can damage seals. If your machine allows backflushing (check the manual), regular water backflushing prolongs component life by preventing oil buildup that hardens into varnish.
Troubleshooting: Fixing Bad Shots, Weird Pressure, and Weak Steam
“Why Are My Shots Bad?” (Sour, Bitter, Channeling)
Dialing In Basics: Dose, Grind, Time, Yield
Start with a baseline recipe: 18g dose (coffee in), 36g yield (liquid out), in 25–30 seconds from first drip to cutoff. If shots taste sour (under-extracted), grind finer to increase extraction time and surface area; if bitter (over-extracted), grind coarser. Adjust only one variable at a time: change grind first, then dose, then tamp pressure or distribution technique. Channeling (water finding paths through weak spots) shows as spurting or uneven flow and indicates distribution problems—use WDT (Weiss Distribution Technique), better tamping, or a puck screen.
Stepped vs Stepless Grinder Adjustments
Stepped grinders jump between fixed grind sizes (e.g., setting 5 to setting 6), sometimes making ideal dialing-in impossible because the perfect grind falls between steps. Stepless grinders offer infinite adjustment, allowing tiny turns to nail the exact grind that hits your target shot time. This precision is why serious espresso grinders use stepless adjustment—you’re not fighting the grinder’s limitations, you’re chasing your perfect extraction.
Why Is My Breville Shot Dripping or Pressure Acting Weird After Descaling?
Airlocks, Scale Chunks, and Blocked Screens
Descaling solutions dislodge scale deposits that can migrate into the pump inlet, group head screen, or three-way valve, restricting flow and causing low pressure or dripping shots. The pressure gauge may read high while actual flow is low because the restriction is downstream of the gauge. Remove the shower screen and dispersion plate, soak in hot water with espresso cleaner, scrub away any white deposits, and reassemble. Run several blank shots through the group to flush remaining debris, and if the problem persists, the scale may have reached the pump or boiler outlet (requiring professional service).
When to Check Shower Screen, Baskets, and Three‑Way Valve
Check the shower screen first (easiest access): unscrew with a flathead or remove the screw holding it in place, inspect for clogs or scale, soak and scrub clean. Inspect portafilter baskets for dents, warping, or clogged holes (coffee oils harden over time); replace baskets every 1–2 years. Three-way valve issues present as dripping portafilter after shot completion or pressure not releasing—this requires partial disassembly and is best tackled with manufacturer guides or professional help.
“How Do I Stop Losing Pressure or Steam Performance?”
Single Boiler Limitations and Recovery Time
Single-boiler machines physically cannot maintain both brew and steam temperature simultaneously; switching modes requires heating or cooling the entire boiler. If you pull a shot immediately after steaming without flushing, the water is too hot and over-extracts (bitter); if you steam immediately after brewing without waiting, the boiler hasn’t reached steam temp yet (weak steam). This isn’t a malfunction—it’s physics. Wait 30–60 seconds between tasks or upgrade to heat-exchanger or dual-boiler to eliminate recovery time.
Workflow Tweaks for Back‑to‑Back Milk Drinks
On single-boiler machines, pull all shots first (while boiler is at brew temp), immediately switch to steam mode, steam all milk portions, then switch back to brew and flush before the next round. This batching minimizes mode-switching and wait time. Alternatively, steam-first workflows (steam cold milk, let boiler cool, pull shots into steamed milk reheated quickly) work for patient users.
When to Call a Technician vs DIY Fixes
Safe Home Tasks vs “Do Not Open This”
Safe DIY: backflushing, shower screen removal, gasket replacement, descaling (following instructions), adjusting grind, cleaning steam wand, replacing portafilter baskets. Do not open: pump housing, boiler internals (unless experienced), pressurized components while hot, electrical wiring (unless qualified). E61 group rebuilds sit in the middle—doable with research and patience, but mistakes can require professional rescue.
Warranty, Service Centers, and Parts Sourcing
Opening your machine or using non-approved descaling chemicals typically voids manufacturer warranties. If your machine is under warranty and experiencing problems, contact the manufacturer first—DIY attempts may disqualify you from free repair. For out-of-warranty machines, aftermarket parts (group gaskets, screens, baskets, seals) are widely available from espresso specialty retailers; OEM parts come from manufacturer service departments or authorized dealers.
Beginner Semi-Auto Onboarding: 30‑Day Playbook
Week 1: Basic Workflow and Safety
Warm‑Up, Purge, Pull Shot, Steam Milk, Quick Clean
Day 1–7 goal: establish a repeatable routine without worrying about perfection. Turn machine on, wait for ready indicator (or 10–15 minutes for non-PID machines), flush group head for 3 seconds to stabilize temperature, lock in portafilter, start shot, watch for 25–30 second total time. Switch to steam mode (if single-boiler), purge wand briefly, submerge tip just below milk surface, steam to 140–150°F (hand-warm), purge wand again, wipe clean. After each session, run a quick water backflush (10 seconds) and wipe down group gasket.
Simple Baseline Recipe for Espresso and Milk Drinks
Start with 18g coffee in, 36g liquid out (1:2 ratio), in 25–30 seconds. Use medium-light to medium roasts initially (easier to dial in than dark roasts). For milk drinks, use whole milk (easier to steam than skim or alternative milks), aim for silky microfoam rather than stiff peaks, and prioritize consistency over latte art.
Week 2: Dialing In and Consistency
Using a Scale, Timer, and Simple Ratios
Week 2 goal: measure everything and start noticing patterns. Weigh your dose on a scale (cheap jewelry scales work fine), place a scale under your cup to measure yield in real time, use your phone’s timer or the machine’s built-in timer. If shots finish too fast (<20 seconds), grind finer; if too slow (>35 seconds), grind coarser. Taste every shot and note sour (under-extracted, grind finer) vs bitter (over-extracted, grind coarser).
Adjusting Grind vs Dose (What to Touch First)
Always adjust grind size first—it’s the most powerful extraction variable. Only adjust dose if your grinder is at its limits (too fine causes choking, too coarse still flows too fast). Small grind changes (one stepless notch, or half a stepped setting) produce noticeable shot-time differences; wait 1–2 shots after adjusting to see the full effect as residual grounds purge.
Week 3–4: Milk Drinks Without Panic
Basic Steam Technique and Microfoam Targets
Purge steam wand briefly before inserting into milk. Position tip just below surface (hear hissing, see gentle whirlpool), hold there until milk volume increases 20–30%, then submerge deeper to heat without adding more air. Turn off steam when pitcher becomes too hot to hold comfortably (140–150°F), purge wand immediately, wipe clean. Microfoam should look like wet paint (glossy, no big bubbles), pour easily, and taste sweet.
Building a Repeatable Morning Routine
Week 4 goal: make your daily latte without thinking, freeing mental energy to refine quality. Time yourself: most users settle into 8–12 minutes for two drinks including grinding, pulling shots, steaming milk, and cleanup. Identify your friction points (grind adjustment taking too long, tamping inconsistency, milk temperature guessing) and address them with tools or technique tweaks.
FAQs: Semi-Automatic Espresso Machines
What is a semi-automatic espresso machine, and how is it different from automatic and superautomatic machines?
A semi-automatic espresso machine requires you to grind coffee separately, dose and tamp it into a portafilter, and manually start and stop the shot, while the machine handles pump pressure and temperature automatically. Automatic machines stop the shot at a preset volume (you still grind and tamp), and superautomatic machines handle grinding, dosing, brewing, and often milk frothing with zero manual input. Semi-automatics offer maximum control over extraction variables, making them the choice of professionals and enthusiasts.
Are semi-automatic espresso machines good for beginners who mostly drink milk drinks?
Yes, especially models with strong steam wands and user-friendly features like the Breville Bambino Plus (which automates milk frothing) or Gaggia Classic Pro (which provides powerful manual steaming). Milk drinks are actually easier for beginners than straight espresso because milk’s sweetness and body mask minor extraction flaws while you’re learning to dial in. Single-boiler machines require brief waits between brewing and steaming, but this is manageable for home use.
How much should a beginner realistically spend on a semi-automatic machine and grinder combo?
Budget a minimum of $500–$600 total for a capable setup: $250–$350 for a machine (Breville Bambino, used Gaggia Classic Pro) and $250–$300 for an espresso-capable grinder (Eureka Mignon Crono with espresso burrs, Baratza Encore ESP). Spending less than $500 total usually means compromising on the grinder, which undermines shot quality more than a cheaper machine would. If possible, stretch to $700–$900 to access better machines and grinders that you won’t outgrow within a year.
Is it better to buy an all‑in‑one machine with a built‑in grinder or separate machine and grinder?
Separate machine and grinder wins for anyone who cares about long-term espresso quality and upgrade flexibility. Built-in grinders on sub-$800 all-in-ones become the limiting factor within months, forcing you to buy a standalone grinder and rendering the integrated unit wasted money. All-in-ones make sense only for extreme space constraints, convenience-above-quality priorities, or users testing whether espresso is a temporary interest.
Which is more important for espresso quality: the semi-automatic machine or the grinder?
The grinder matters more, especially at lower budgets. A $200 machine paired with a $400 grinder consistently outperforms a $400 machine with a $200 grinder because grind uniformity and stepless adjustment directly determine extraction quality. Machines provide stable pressure and temperature (which most models do adequately), but only an espresso-capable grinder delivers the particle-size distribution required for proper extraction.
Do I really need a dual boiler semi-automatic espresso machine for great lattes at home?
No, but it significantly improves workflow if you make 4+ milk drinks daily or serve multiple people. Single-boiler machines make excellent lattes; you simply wait 30–60 seconds between pulling shots and steaming milk. Dual boilers eliminate that wait and provide better temperature consistency, but cost $1,200–$2,000 versus $300–$700 for capable single-boiler machines. Most home users thrive on single boilers and upgrade to dual boilers only after hitting single-boiler limitations.
How often should I backflush, detergent backflush, and descale my semi-automatic (including E61‑style machines)?
Water backflush for 30 seconds at the end of any day you use the machine; detergent backflush every 4–6 months for home use (3–4 shots daily) or every 6–12 weeks for heavier use. Descaling frequency depends entirely on water quality—proper water (Third Wave Water, DIY recipes) can eliminate descaling need entirely; hard tap water may require descaling every 3–6 months. Always follow manufacturer descaling guidelines to avoid voiding warranties.
What kind of water should I use to avoid scale and protect my machine and warranty?
Use water “soft enough to be scale-free” (under 100 ppm total dissolved solids) while retaining enough minerals for proper extraction and taste. The most reliable approach: start with distilled or reverse-osmosis water and add Third Wave Water mineral packets, which provide SCA-approved mineral balance without scale risk. Avoid straight tap water (usually too hard), straight distilled water (too soft, can prevent operation and tastes flat), and standard Brita-style filters (don’t remove enough hardness). Proper water eliminates most maintenance headaches and extends machine lifespan dramatically.
Why is my pressure gauge or shot behavior weird after descaling, and how do I fix it?
Descaling can dislodge scale chunks that migrate into the shower screen, three-way valve, or pump inlet, restricting flow and causing erratic pressure readings or dripping shots. First, remove and thoroughly clean the shower screen and dispersion plate, checking for white calcium deposits. Run several blank shots (no portafilter) through the group to flush debris, and pull multiple shots over the next day to purge airlocks. If the problem persists after these steps, scale may have reached internal components requiring professional service.
How long do semi-automatic espresso machines typically last with proper maintenance?
“Tanky” machines like the Gaggia Classic Pro, Rancilio Silvia, and E61-style prosumer models routinely last 10–15+ years with regular gasket replacement, backflushing, and proper water. Appliance-style machines (many Breville models) typically last 5–7 years with good care, though their proprietary parts and electronics can make repairs cost-prohibitive once out of warranty. Lifespan depends less on build quality than on water quality, maintenance consistency, and usage volume. Machines running on hard tap water without descaling may fail within 2–3 years from scale damage.
Can a semi-automatic espresso machine make regular coffee, or do I need another brewer?
Semi-automatic espresso machines brew only espresso (concentrated coffee extracted under pressure), not regular drip coffee. You can dilute espresso with hot water to make an Americano, which resembles drip coffee but tastes different due to the extraction method. For true drip or pour-over coffee, you’ll need a separate brewer—most espresso enthusiasts keep both. Some users successfully brew “long shots” (larger yields with coarser grinds), but this produces suboptimal results compared to proper brewing methods for each style.
What grinder features matter most for espresso (stepless vs stepped, burr size, retention)?
Stepless adjustment is critical because espresso dialing-in often requires tiny changes that stepped grinders can’t make—the perfect grind frequently falls between steps. Fine adjustment range ensures the grinder can reach true espresso fineness without stalling; many drip-focused grinders bottom out too coarse. Low retention (under 1 gram of grounds remaining in the grinder) prevents stale coffee mixing with fresh and reduces waste between doses. Burr size (50mm+ for flats, 64mm+ for conicals) correlates with grind uniformity and longevity—larger burrs grind more consistently and stay sharp longer. These features explain why dedicated espresso grinders cost $200–$600+ while drip grinders cost $50–$150.
Final Recommendations
Semi-automatic espresso machines reward patience, proper equipment pairing, and consistent maintenance with café-quality drinks at a fraction of commercial prices. The most common mistakes—buying an inadequate grinder, ignoring water quality, or choosing an all-in-one for convenience—create upgrade regret within months. Start with a proven machine-and-grinder pairing matched to your budget and drink preferences, use properly mineralized water from day one, and establish simple maintenance routines. The learning curve feels steep initially but flattens within 2–3 weeks of consistent practice. Your future self will thank you for buying separate components, prioritizing the grinder, and investing in proper water—these three decisions prevent 90% of the frustration beginners experience.