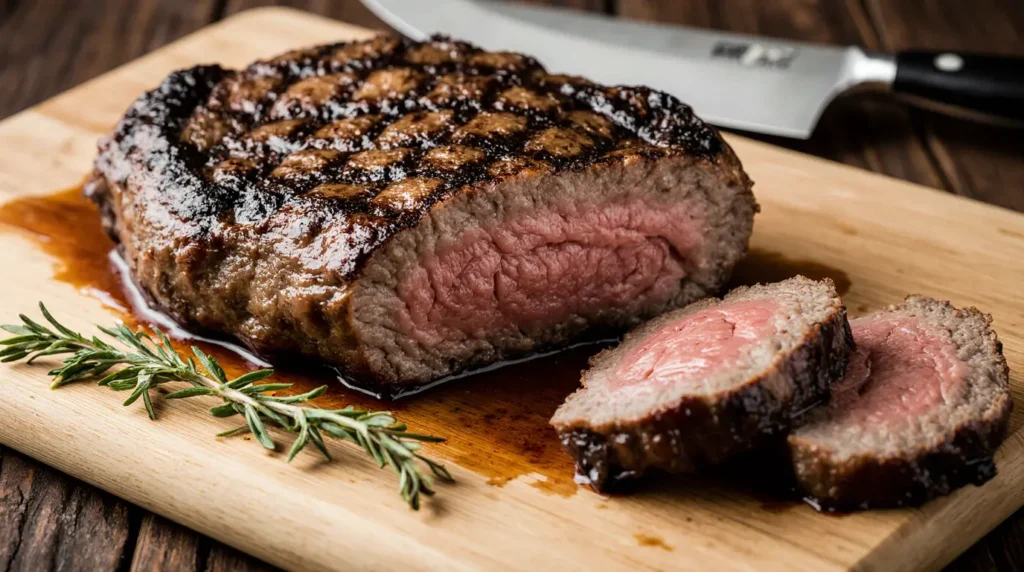
Sous Vide Flank Steak is your new favorite kitchen project! We’re diving into a fantastic way to prepare this popular cut of beef, bringing out incredible flavor and tenderness like never before.
Many home cooks love flank steak for its lean profile and rich taste. While traditional grilling can sometimes leave it chewy, this method unlocks its full potential with ease. In this guide, you’ll learn how to select the best cut, prepare it properly, and achieve perfect doneness—finishing with a quick, high-heat sear for a beautifully caramelized crust.
Sous vide cooking offers unmatched precision and consistency, making it ideal for flank steak. We’ll cover essential equipment, temperature and timing charts, seasoning tips, and serving ideas to help you create a restaurant-quality meal at home. Whether you’re new to sous vide or already a fan, this friendly, step-by-step guide will boost your confidence and elevate your cooking.
Overview of Flank Sous Vide Steak Cooking
Discover the science behind achieving restaurant-quality results with precision temperature control. This approach originated in France, where chefs developed a method called “under vacuum” cooking.
The process involves sealing food in airtight bags and immersing them in a water bath. Unlike traditional methods, this sous vide technique maintains exact heat levels throughout. Your beef cooks evenly from edge to edge without overcooking the outside.
This cooking style works exceptionally well with lean cuts that can become tough. The gentle, prolonged heat breaks down connective tissues while locking in natural juices. What emerges is incredibly tender meat with enhanced flavor.
Many compare this approach to a sophisticated slow cooker. It combines convenience with precision control for consistent outcomes. Once you grasp the basic principles, you’ll find it simpler than conventional steak preparation.
The flat shape of this particular cut makes it ideal for uniform heat distribution. Flank steak is a lean cut from the abdominal muscles that responds beautifully to gentle, prolonged cooking. You get perfect results whether cooking for weeknight dinners or special occasions.
Essential Equipment and Ingredients for Flank Sous Vide Steak
Before we dive into the cooking process, let’s ensure you have all the necessary equipment and components for success. Having the right tools makes this cooking method straightforward and enjoyable.
The core equipment includes a precise heating device that maintains water temperature. You’ll also need a way to seal your ingredients in airtight packaging. A large container holds the water bath, and a heavy pan creates the final sear.
| Essential Equipment | Primary Function | Alternative Options |
|---|---|---|
| Immersion Circulator | Heats and circulates water | Dedicated precision cooker |
| Vacuum Sealer | Removes air from bags | Heavy-duty ziplock bags |
| Water Container | Holds cooking bath | Large pot or cooler |
| Cast Iron Skillet | Provides high-heat searing | Grill or heavy-bottomed pan |
For your main ingredient, choose a quality beef cut around 1.5 pounds. This size works well for most setups and serves four people. Season with kosher salt and your favorite herbs or spices.
Fresh oregano, rosemary, or custom blends add wonderful flavor. You’ll need high smoke point oil for searing. Options include avocado oil or ghee.
Don’t worry about expensive gear. Many household items work perfectly. The water displacement method makes this technique accessible to all cooks. Great results come from technique, not costly equipment.
Preparing Your Flank Steak for a Perfect Sous Vide Experience
Proper preparation transforms this lean cut into a tender masterpiece. Taking time before cooking ensures your final dish exceeds expectations. This approach makes a significant difference in texture and flavor.
Begin with high-quality beef from your trusted butcher. The rectangular shape of this particular cut of beef promotes even heat distribution. This characteristic makes it ideal for precision cooking methods.
Check your meat for any tough silverskin or excess fat along the edges. Most pieces require minimal trimming since they’re naturally lean. A quick inspection takes just moments but improves the final result.
Consider bringing your beef to room temperature if time allows. You can also cook directly from refrigeration with adjusted timing. Frozen cuts work well too with extended cooking periods.
If using a marinade or dry rub, apply it during preparation. Allow several hours or overnight for flavors to penetrate deeply. This step builds the foundation for your dish’s final taste profile.
Have your equipment ready while preparing the meat. Quality kitchen tools and utensils make the entire process smoother and more enjoyable.
These simple preparation steps yield impressive rewards. Your effort converts a potentially tough piece into succulent, flavorful beef. Great meals begin with thoughtful groundwork.
Scoring, Seasoning, and Marinating Techniques
Many home cooks overlook these crucial steps that professional chefs always perform. Proper preparation makes a significant difference in your final dish.
Proper Scoring Methods for Even Cooking
Scoring creates shallow cuts in a crosshatch pattern. Use a sharp paring knife held at a slight angle. Having quality cutting surfaces protects your knife edges—learn more about durable cutting board options for your prep work..
Drag the blade diagonally across the surface with light pressure. Then repeat in the opposite direction to create diamond shapes. Remember to flip and score the other side too.

This technique helps the meat cook evenly. It prevents curling during searing. Scoring also creates channels for better flavor penetration.
Effective Seasoning and Marinade Tips
You have many options for adding flavor. A simple approach uses just salt and pepper. More complex blends can include various herbs and spices.
Salt is absolutely essential for great taste. Don’t be shy when applying your seasoning blend. Some will be lost during the cooking process.
| Seasoning Method | Key Ingredients | Best For | Preparation Time |
|---|---|---|---|
| Herbed Salt | Kosher salt, fresh oregano | Classic flavor | 5 minutes |
| Southwestern Blend | Cumin, chili powder, garlic | Bold, warm flavors | 10 minutes |
| Simple Rub | Salt, pepper, herbs | Quick preparation | 2 minutes |
| Overnight Marinade | Liquid seasonings, spices | Deep flavor penetration | 8+ hours |
For deeper flavor, apply dry rubs several hours before cooking. Overnight preparation in the refrigerator yields excellent results. This allows seasonings to work into the meat fibers.
Pepper might develop bitter notes if it burns during searing. But this is rarely a significant issue. Most people include it without problems.
Adventurous cooks can experiment with liquid smoke. This adds an interesting smoky dimension. It’s optional but can create unique flavor profiles.
Vacuum Sealing and Alternative Bagging Methods
Getting your seasoned beef ready for the water bath is a simple but vital step. Proper bagging ensures excellent heat transfer for perfectly cooked results.
The goal is to remove as much air as possible. This creates direct contact between the water and the bag’s surface.
Using a vacuum sealer is the ideal way to achieve this. It removes virtually all air and creates a tight seal. Don’t worry if you don’t own this piece of equipment.
The water displacement method is a fantastic alternative. Many cooks use this technique regularly. It works remarkably well.
Here’s how to use the water displacement method:
- Place your meat in a heavy-duty, freezer-safe zipper bag.
- Seal the bag almost completely, leaving a one-inch opening.
- Slowly lower the bag into the preheated water bath. Keep the opening above the surface.
- Water pressure will push the air out. Once most air is gone, fully seal the bag.
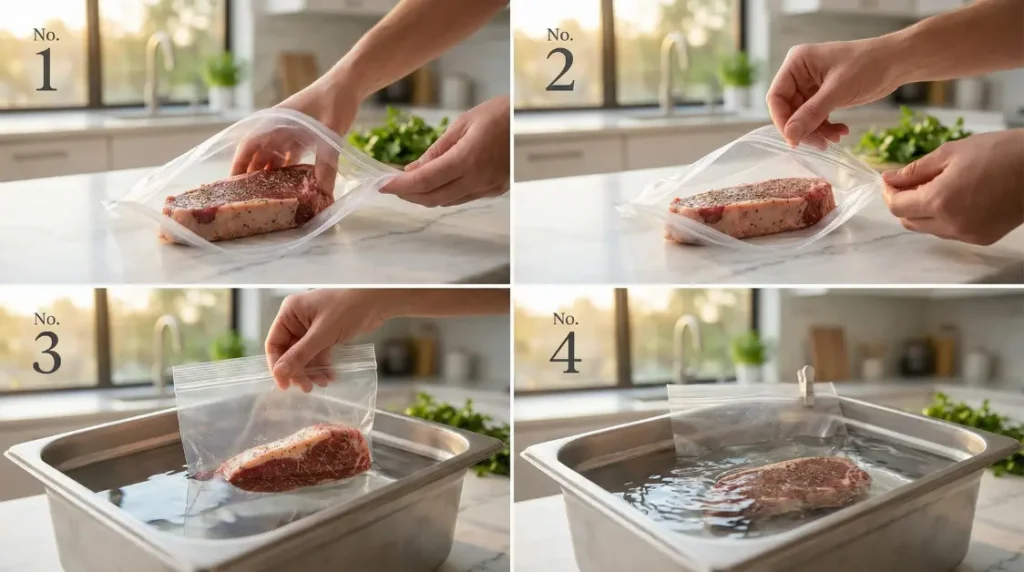
A tiny bit of remaining air is perfectly fine for standard cooks. It won’t affect your outcome. For cooks lasting over 12 hours, a true vacuum seal is better to prevent leaks.
Whichever way you choose, always double-check your seal is secure before starting.
| Bagging Method | Best For | Ease of Use | Air Removal |
|---|---|---|---|
| Vacuum Sealer | Long cooks, frequent use | Very Easy | Excellent |
| Water Displacement | Short to medium cooks, beginners | Easy | Very Good |
Setting Up Your Sous Vide: Temperature and Time Guidelines
The beauty of precision cooking lies in setting the correct temperature and duration. These two factors work together to create perfect results every time.

Getting these settings right ensures your beef turns out exactly as you want it. The process is straightforward once you understand the basics.
Understanding Temperature Settings for Doneness
Temperature determines your final doneness level. Each setting creates a specific interior color and texture.
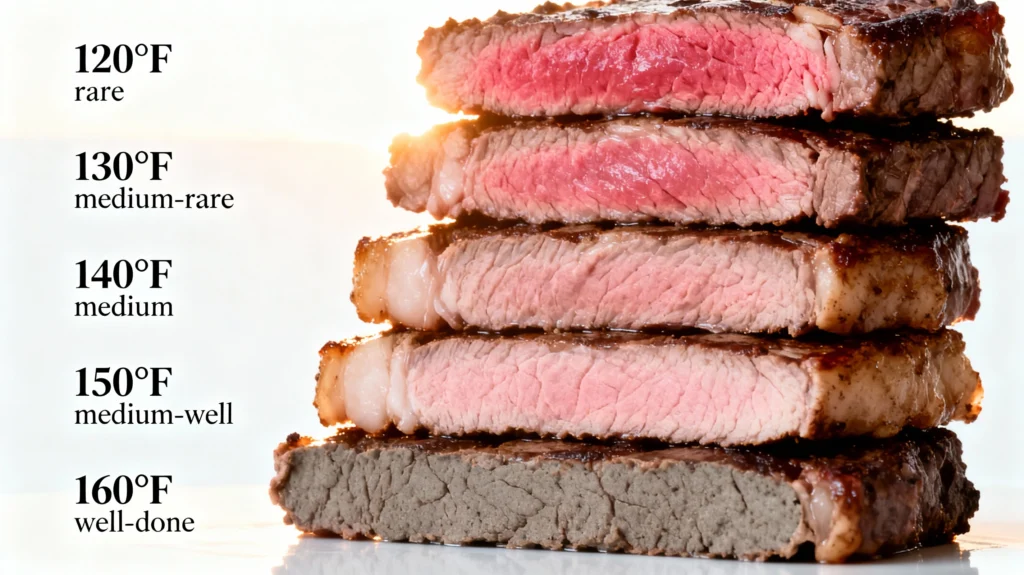
For rare results, aim for 123-127°F. This creates a cool red center with maximum juiciness.
Medium rare is the most popular choice among cooking enthusiasts. Set your device between 128-134°F for a warm red center.
Higher temperatures like 135-140°F yield medium doneness with a pink center. Well-done settings above 140°F are not typically recommended for this lean cut.
| Doneness Level | Temperature Range | Interior Appearance | Recommended For This Cut |
|---|---|---|---|
| Rare | 123-127°F | Cool red center | Good |
| Medium Rare | 128-134°F | Warm red center | Excellent |
| Medium | 135-140°F | Warm pink center | Acceptable |
| Well Done | 141°F+ | Little or no pink | Not Recommended |
Temperature and Timing Charts for Sous Vide Steak Cuts
Different cuts of beef require specific temperature and timing adjustments for optimal results. Understanding these variations helps you apply sous vide techniques to your favorite steaks with confidence.
The charts below provide precise guidelines for popular cuts. Each steak has unique characteristics that influence the ideal cooking approach.
Strip, Ribeye, Porterhouse/T-Bone, and Butcher’s Cuts: Temps and Times
Highly marbled cuts like ribeye and strip steaks benefit from slightly higher temperatures than leaner options. Their abundant intramuscular fat keeps them moist and delivers exceptional flavor.
Medium-rare to medium temperatures between 129°F and 135°F work beautifully for these fattier cuts. The natural fat insulation means they take slightly longer to reach the target temperature.
Porterhouse and T-bone steaks combine two different muscles in one cut. The strip side cooks similarly to other well-marbled cuts.
| Doneness Level | Temperature Range | Cooking Time | Best For |
|---|---|---|---|
| Rare | 120-128°F (49-53°C) | 1-2.5 hours | Bold beef flavor |
| Medium Rare | 129-134°F (54-57°C) | 1-4 hours | Recommended |
| Medium | 135-144°F (57-62°C) | 1-4 hours | Balanced texture |
| Medium Well | 145-155°F (63-68°C) | 1-3.5 hours | Firmer texture |
| Well Done | 156°F+ (69°C+) | 1-3 hours | Fully cooked |
All timings apply to steaks 1½ to 2 inches thick. For thinner cuts of 1 inch or less, reduce the initial cooking time to 40-45 minutes.
Steaks cooked below 130°F should not exceed 2½ hours for food safety reasons. The cooking window provides flexibility without compromising quality.
Tenderloin: Temps and Times
Tenderloin is exceptionally lean and easily overcooked without proper technique. This premium cut lacks intramuscular fat, making it prone to dryness at higher temperatures.
Cook tenderloin several degrees lower than fattier cuts for optimal tenderness and moisture. The very rare to rare range between 120°F and 128°F delivers the best texture.
This delicate cut reaches temperature faster due to its lean composition. Shorter minimum cooking times prevent overcooking while still providing tender results.
| Doneness Level | Temperature Range | Cooking Time | Texture Result |
|---|---|---|---|
| Very Rare to Rare | 120-128°F (49-53°C) | 45 min-2.5 hours | Optimal tenderness |
| Medium Rare | 129-134°F (54-57°C) | 45 min-4 hours | Tender and moist |
| Medium | 135-144°F (57-62°C) | 45 min-4 hours | Firmer, less juicy |
| Medium Well | 145-155°F (63-68°C) | 45 min-3.5 hours | Not recommended |
| Well Done | 156°F+ (69°C+) | 1-3 hours | Not recommended |
For tenderloin steaks under 1 inch thick, shorten the initial cooking time to just 30 minutes. The same food safety guidelines apply—avoid cooking below 130°F for more than 2½ hours.
These precise guidelines transform each cut into a restaurant-quality masterpiece. Experiment with temperatures within each range to discover your personal preference
Optimal Cooking Times for Tender Results
Time works with temperature to achieve perfect tenderness. The recommended range is 2-4 hours for best results.
This duration allows the gentle heat to break down connective tissues. Shorter cooking may not fully tenderize the meat.
You cannot traditionally overcook with precise temperature control. However, exceeding 4 hours can make the texture mushy.
Frozen cuts need extra time—add 30-60 minutes to your cooking duration. The flexible timing window makes this method very forgiving.
The Cooking Process: Achieving Perfect Medium Rare
The actual cooking phase is surprisingly simple and largely automated once everything is set up. Your preparation work pays off during this hands-off stage that delivers consistent results.
Gently lower your sealed bag into the preheated water bath. Make sure the entire piece is fully submerged for even heat distribution. If the package floats, use a heavy spoon or plate to weigh it down.
For ideal medium rare texture, set your temperature to 129°F or 133°F. The cooking window of 2-4 hours provides flexibility for your schedule. This gentle heat breaks down tough tissues while preserving moisture.
During these hours, you’re free to prepare side dishes or handle other tasks. The flat shape ensures uniform cooking from edge to edge. No flipping or monitoring is needed – your circulator maintains perfect conditions.
You can cook multiple portions simultaneously by placing them side by side. Just avoid stacking bags on top of each other. Each piece will come out perfectly cooked to your preferred doneness.
This method’s precision eliminates guesswork and delivers restaurant-quality results every time. The extended cooking transforms what could be chewy into wonderfully tender meat.
Searing Techniques for a Delicious Finish
This crucial finishing technique brings together texture and flavor in one quick step. The gentle cooking process delivers perfect doneness, but the final sear creates that restaurant-quality crust.
Remove your meat from the water bath and bag. Pat it completely dry with paper towels. Moisture prevents proper browning, so take extra time here.
Heat a cast iron skillet over high heat until smoking hot. Add high smoke point fat like avocado oil. Place your dried flank steak in the pan.
Let it sit undisturbed for 30-60 seconds per side. Resist moving it around. You want a deep brown crust to form quickly.
| Searing Method | Heat Level | Time per Side | Best Results |
|---|---|---|---|
| Cast Iron Skillet | Very High (375-400°F) | 30-60 seconds | Excellent crust, even sear |
| Grill | Extremely High | 60-90 seconds | Good flavor, risk of unevenness |
The entire sear should take 2-4 minutes total. Work quickly to protect the interior doneness. This way preserves the perfect texture.
Some cooks add garlic or herbs during the final minutes. This optional step adds extra flavor. The contrast between crispy exterior and tender interior makes each bite incredibly satisfying.
Serving Suggestions and Accompaniments
Your perfectly cooked beef deserves equally impressive sides to complete the meal. The final presentation is just as important as the cooking process itself.
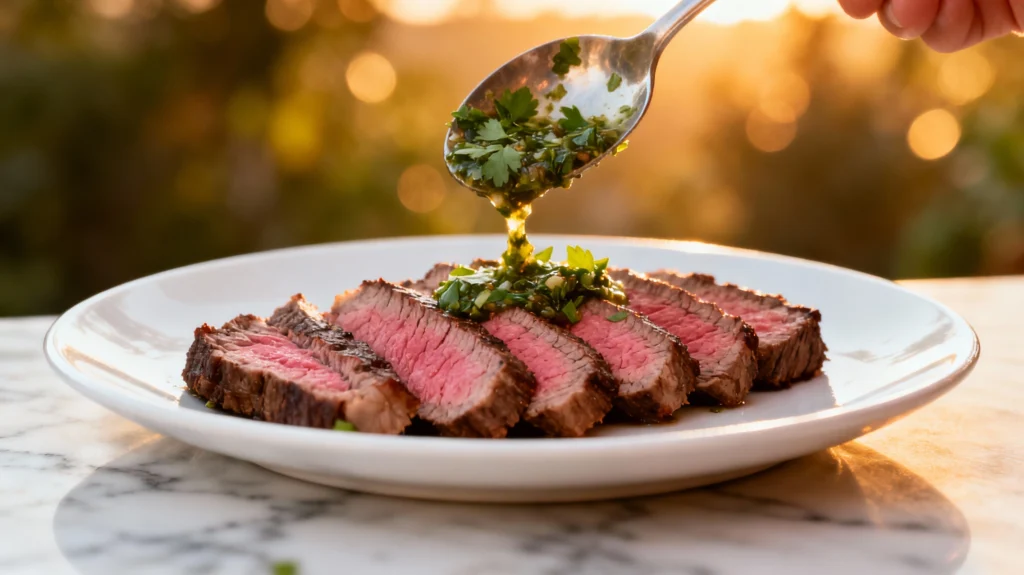
First, let your meat rest for a few minutes after searing. Then, slice it into ½-inch pieces. Always cut against the grain for maximum tenderness.
Classic Chimichurri Sauce
This vibrant Argentinian sauce is a perfect partner for rich beef. It adds a fresh, tangy flavor that balances the dish beautifully.
To make it, you’ll need a few simple ingredients:
- One bunch each of fresh parsley and cilantro
- One garlic clove
- Four dried arbol chiles (seeds included)
- 1/3 cup olive oil and 1/4 cup white wine vinegar
- Salt to taste
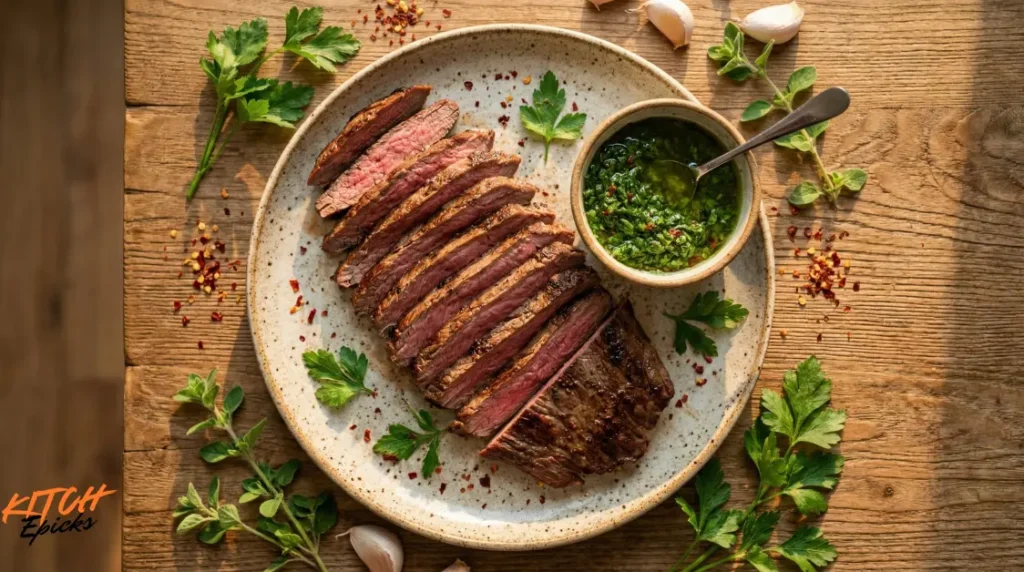
Use a food processor for a chunkier texture. A blender can make the olive oil taste bitter. For best results, make the sauce a day ahead. The vinegar gently mellows the herbs and garlic overnight.
For other serving ideas, try making fajitas or steak sandwiches. A fresh salad or roasted vegetables also make excellent side dishes. Get creative with your favorite recipes!
Tips for Storing and Reheating Your Steak
Your delicious meal doesn’t have to end after one sitting. Properly saving the extra bits lets you enjoy your hard work for days. This is a great way to plan quick future meals.
First, let your cooked meat cool down completely. Do not put hot things directly into the refrigerator. This helps keep your fridge at a safe temperature for all your food.
Slice any remaining pieces before you put them away. Pre-sliced portions are much easier to reheat evenly. It also makes grabbing a quick portion for a salad or sandwich super simple.
For short-term keeping, place the cooled slices in an airtight container. It will stay fresh and tasty in the refrigerator for up to four days. This maintains the quality you worked so hard to achieve.
For longer storage, the freezer is your friend. Wrap portions tightly in aluminum foil. Then, place them in a zip-top bag, squeezing out all the air. Consider using quality food storage containers for better organization and freshness.
To reheat, use your oven set to 350°F. Warm the slices for about ten minutes or until heated through. This gentle method brings it back to life without overcooking.
Leftovers are incredibly versatile. Try them cold in salads or warmed in tacos. Having proper meal prep tools and storage solutions makes planning multiple meals from one cooking session much easier.
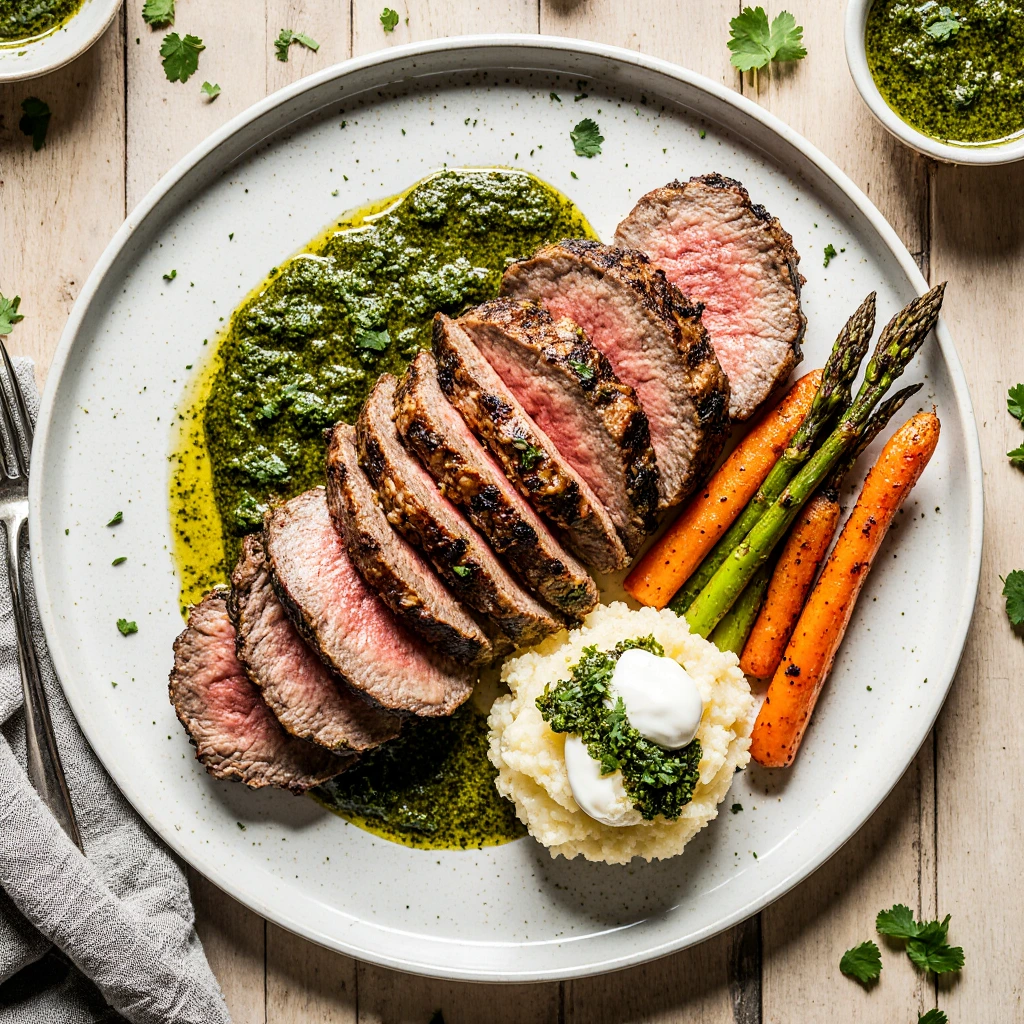
Sous Vide Flank Steak with Chimichurri Sauce
Ingredients
Equipment
Method
- Score the steak: Using a sharp knife, create shallow crosshatch cuts in a diagonal pattern on both sides of the flank steak. This helps with even cooking and prevents curling.
- Season generously: Pat the steak dry and season both sides liberally with kosher salt and black pepper. Add optional garlic if desired.
- Bag the steak: Place the seasoned flank steak in a vacuum-seal bag or heavy-duty freezer bag. If using a freezer bag, use the water displacement method by slowly lowering the bag into water to remove air, then seal completely.
- Set up water bath: Preheat your sous vide immersion circulator to 129°F (54°C) for rare or 133°F (56°C) for medium-rare.
- Cook the steak: Submerge the sealed bag in the water bath, ensuring it's fully submerged (use a weight if needed). Cook for 2 to 4 hours. The extended time breaks down connective tissues for maximum tenderness.
- Process herbs: Add parsley, cilantro, garlic, and dried arbol chiles to a food processor. Pulse until finely minced.
- Add liquids: Add olive oil, white wine vinegar, and salt. Pulse 2-3 times to combine. For best results, make this sauce a day ahead to allow flavors to meld.
- Prepare for searing: Remove steak from bag and pat completely dry with paper towels. Moisture prevents proper browning.
- Sear the steak: Heat cast iron skillet over very high heat (375-400°F) until smoking. Add avocado oil. Sear steak 30-60 seconds per side without moving it.
- Rest and slice: Let steak rest 3-5 minutes. Slice into ½-inch pieces against the grain for maximum tenderness. Serve with chimichurri sauce.
Notes
- Rare: 123-127°F (2-4 hours)
- Medium Rare: 128-134°F (2-4 hours) – Recommended
- Medium: 135-140°F (2-4 hours)
- Chimichurri tastes best when made a day ahead
- Don’t exceed 4 hours cooking time to avoid mushy texture
- Add 30-60 minutes cooking time if starting from frozen
- Leftover steak stores in refrigerator for up to 4 days
- Reheat in 350°F oven for 10 minutes
Conclusion
Transforming everyday ingredients into extraordinary meals is the true power of precision cooking methods. You now have all the tools to create restaurant-quality results right in your kitchen.
This approach makes a potentially tough cut incredibly tender and juicy. The gentle heat and precise temperature control work magic on lean beef.
The method offers wonderful flexibility for your preferences. Whether you like simple seasoning or complex marinades, you’ll achieve delicious outcomes. The cooking window provides forgiveness for busy schedules.
Your new skills extend beyond this single recipe. Proper preparation and finishing techniques work beautifully with other cuts and proteins.
We’re confident you’ll create amazing meals with these expert tips. Enjoy exploring different flavors and serving styles with your newfound cooking confidence!
Sous Vide Flank Steak FAQs
For a perfect medium-rare finish, set your water bath to 130°F (54°C). This gentle heat ensures the meat is beautifully pink and tender from edge to edge.
We recommend a cooking time between 2 and 4 hours. This range allows the tough connective tissues to break down fully, making the beef incredibly tender without becoming mushy.
While a vacuum sealer is great, it’s not essential. You can use the water displacement method with a sturdy zip-top bag. Just slowly lower it into the water to push the air out before sealing.
That quick, hot sear in a cast-iron skillet or with a torch creates a flavorful, caramelized crust. It adds fantastic texture and a rich, savory taste that contrasts wonderfully with the juicy interior.
Absolutely! Marinating before you bag it is a fantastic way to build deep flavor. Just pat the meat dry before it goes into the bag to ensure a good seal and a better sear later.
This cut pairs wonderfully with a bright, herby chimichurri sauce. For sides, consider roasted potatoes, a crisp green salad, or grilled asparagus to complete your meal.