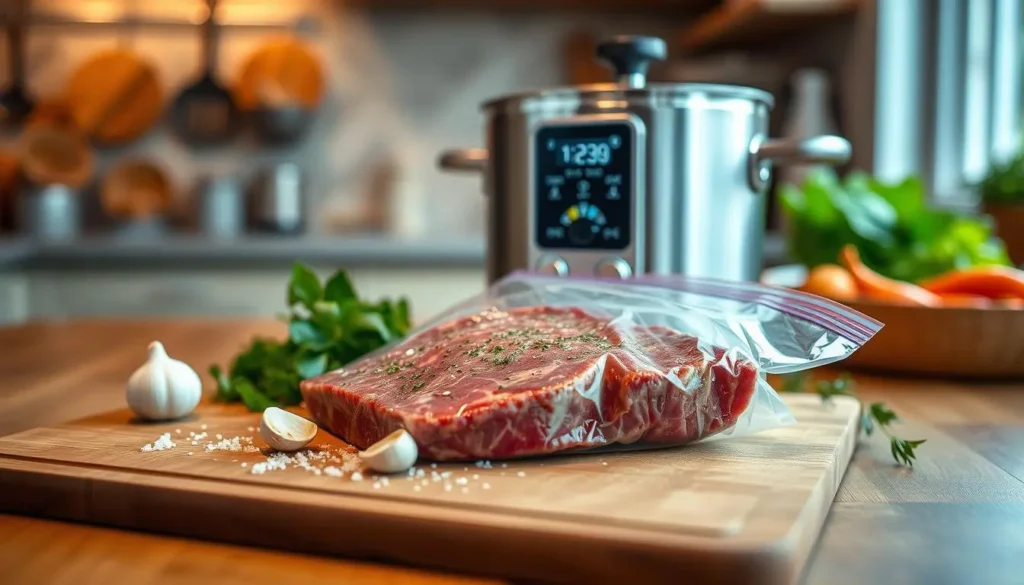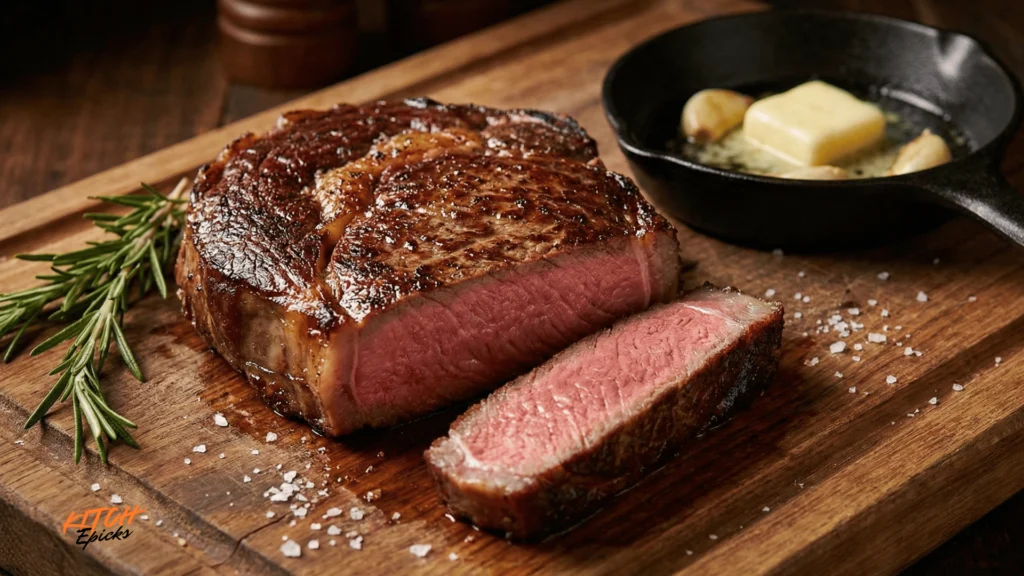
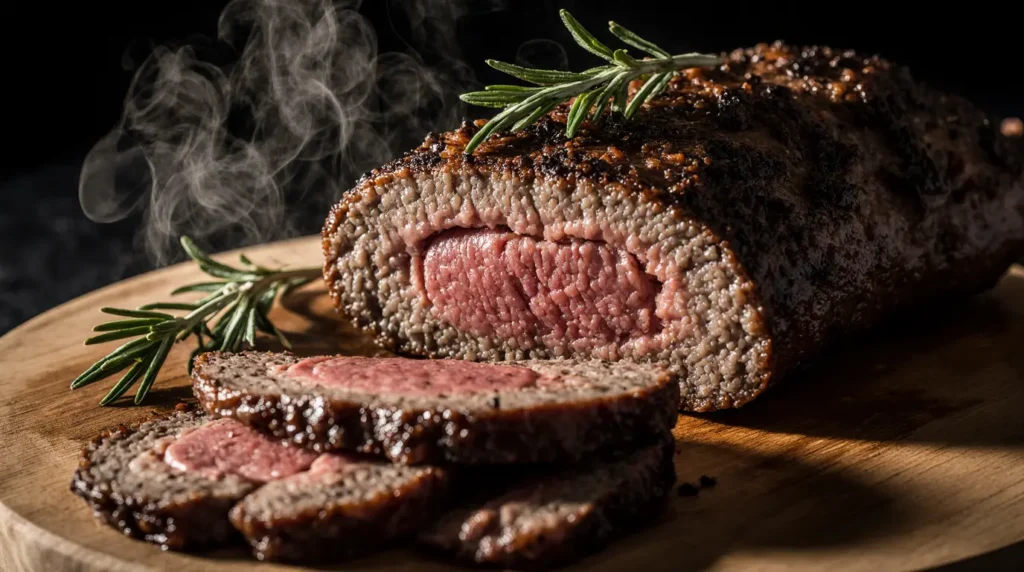
Sous vide brisket is cooked at 155°F for 24-36 hours for fall-apart tender results, or at 135°F for 36-48 hours for sliceable, medium-rare texture. After sous vide cooking, finish the brisket with high heat (smoker, grill, or oven at 450°F) for 30-60 minutes to develop a flavorful bark. This precision cooking method transforms one of the toughest beef cuts into restaurant-quality brisket with minimal hands-on effort and virtually no risk of overcooking.
Traditional brisket smoking requires constant temperature monitoring, wood management, and 12-16 hours of active attention. Sous vide eliminates these challenges while delivering edge-to-edge tenderness that’s nearly impossible to achieve through conventional methods. The immersion circulator maintains exact water temperature within 0.1°F, ensuring consistent collagen breakdown and moisture retention throughout the entire cook.
What Is Sous Vide Beef Brisket?

Sous vide beef brisket involves vacuum-sealing seasoned beef brisket in a plastic bag and submerging it in a precisely temperature-controlled water bath for 24-48 hours. An immersion circulator heats and circulates the water to maintain exact temperatures, typically between 135°F and 155°F depending on your desired texture. This low-and-slow approach breaks down tough connective tissue and collagen into gelatin without drying out the meat.
Brisket comes from the lower chest area of cattle and contains dense connective tissue that requires extended cooking to become tender. Traditional cooking methods risk overcooking the exterior while leaving the interior tough. This brisket sous vide technique solves the problem by cooking the entire brisket uniformly at a temperature that’s scientifically proven to tenderize collagen while preserving moisture.
The technique originated in French fine dining during the 1970s but gained mainstream popularity in the 2010s when affordable home immersion circulators became available. Today, sous vide beef brisket represents the intersection of traditional BBQ culture and modern precision cooking technology, offering consistent results that even experienced pitmasters struggle to achieve with smokers alone. If you’re new to precision cooking, check out our guide on beef sirloin steak sous vide to understand the fundamentals.
Why Cook Brisket Sous Vide? (6 Major Benefits)
1. Perfect Temperature Control Eliminates Overcooking
Traditional brisket cooking requires maintaining smoker temperatures between 225-275°F for 12-16 hours, with temperature fluctuations easily ruining the final product. Sous vide immersion circulators maintain water temperature within 0.1°F of your target, making overcooking virtually impossible. Your brisket reaches the exact target temperature and stays there without progressing to dryness or toughness. This is the same precision technology featured in our smart kitchen tools for healthier cooking roundup.
2. Incredible Tenderness Through Controlled Collagen Breakdown
Brisket contains significant amounts of collagen and connective tissue that must be converted to gelatin for tender results. This conversion occurs optimally between 140-160°F over extended periods. A sous vide beef brisket recipe maintains the meat in this ideal temperature zone for 24-48 hours, allowing enzymes called cathepsins to break down proteins systematically. The result is fork-tender meat that maintains structural integrity rather than falling apart.
3. Edge-to-Edge Consistency Throughout the Entire Brisket
Conventional cooking methods create temperature gradients, with exterior portions often 20-30°F hotter than the center. Sous vide eliminates these gradients entirely—every portion of the brisket reaches the same target temperature simultaneously. When you slice into sous vide brisket, you’ll see uniform color and texture from edge to center, with no dry outer layers or undercooked spots.
4. Hands-Off Cooking Frees Your Time
After sealing and submerging your brisket, the immersion circulator works independently for the entire 24-48 hour cook period. Unlike traditional smoking that requires hourly monitoring, wood additions, and temperature adjustments, sous vide needs only a quick water level check every 12 hours. This makes overnight cooking completely safe and allows you to focus on other meal components.
5. Flexible Timing Accommodates Your Schedule
Brisket cooked at 155°F reaches optimal tenderness between 24-36 hours, but can safely hold for up to 48 hours without becoming mushy. This flexibility means you can start cooking Thursday evening for Saturday dinner without precise timing pressure. If your dinner plans change, the brisket simply continues cooking in its ideal temperature zone without degrading.
6. Superior Moisture Retention Compared to Traditional Methods
Vacuum sealing traps moisture and rendered fat around the brisket throughout the cooking process. While traditional smoking allows moisture to evaporate continuously, sous vide brisket reabsorbs its own juices, resulting in exceptionally moist meat. Studies show sous vide cooking can retain up to 20% more moisture compared to conventional roasting methods.
Sous Vide Brisket Temperature and Time Guide
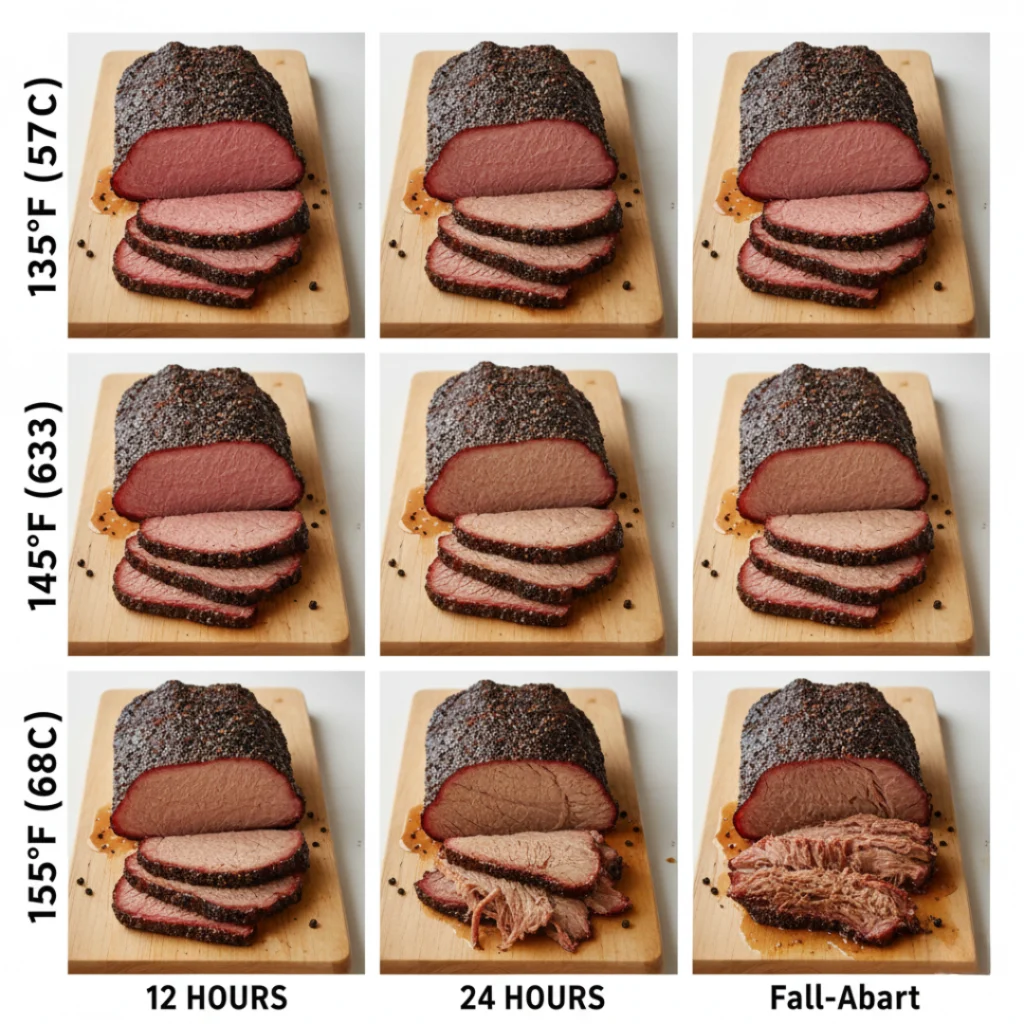
Temperature and time work together to determine your final brisket texture, with higher temperatures producing softer, more fall-apart results and lower temperatures creating firmer, sliceable textures. The collagen in brisket begins breaking down around 140°F, with conversion accelerating significantly above 150°F. Extended cooking times at lower temperatures can achieve similar tenderness to shorter times at higher temperatures, but with different textural characteristics.
| Temperature | Time Range | Final Texture | Best For | Notes |
|---|---|---|---|---|
| 135°F | 36-48 hours | Medium-rare, firm, sliceable | Traditional BBQ texture, pastrami-style | Requires longer time for tenderness |
| 145°F | 30-40 hours | Tender with slight resistance, pink center | Balanced approach, versatile serving | Good middle-ground option |
| 155°F | 24-36 hours | Fall-apart tender, fully rendered | Burnt ends, easy slicing, forgiving | Most popular, beginner-friendly |
| 165°F | 18-24 hours | Very soft, pulls apart easily | Shredded applications, tacos, sandwiches | Risk of mushy texture beyond 24 hours |
Which Temperature Should You Choose?
Most home cooks achieve best results at 155°F for 30 hours, which produces tender brisket that slices cleanly while remaining moist and flavorful. This temperature fully renders the fat cap and converts nearly all collagen to gelatin, creating that satisfying bite-through tenderness BBQ enthusiasts crave. The higher temperature also provides more forgiveness—cooking 28 hours versus 32 hours produces minimal texture differences. This same temperature precision approach is discussed in our sous vide ribeye steak guide.
For sliceable brisket with more chew and a medium-rare center similar to traditional Texas-style BBQ, cook at 135°F for 40-48 hours. This lower temperature preserves more of the muscle fiber structure, creating firmer slices that hold together better on a cutting board. However, this method requires precise timing and works best with well-marbled point cuts rather than leaner flat cuts. If you’re interested in exploring other tough cuts with sous vide, our sous vide flank steak tips provide additional techniques.
Competition-style brisket aimed at burnt ends benefits from 155°F for 32-36 hours, followed by cubing and a second finishing step with additional sauce. The very tender texture allows the cubes to absorb sauce while maintaining enough structure to stay intact on serving platters.
Can You Overcook Sous Vide Brisket?
While sous vide prevents the type of dry, overcooked results common with traditional methods, extended cooking times beyond 48 hours at 155°F can produce undesirably mushy texture. The muscle fibers begin breaking down excessively, and the brisket loses structural integrity. At 135°F, brisket remains safe and maintains good texture up to 60 hours, though most find optimal results between 40-48 hours according to Douglas Baldwin’s authoritative Practical Guide to Sous Vide Cooking.
The practical cooking window at 155°F spans 24-42 hours, with peak texture occurring around 30-36 hours for most briskets. Flat cuts, being leaner, tend toward the shorter end of this range, while fatty point cuts benefit from longer cooking times that fully render intramuscular fat. Always err toward longer cooking times if your brisket seems particularly thick or heavily marbled.
Equipment You’ll Need for Sous Vide Brisket
Essential Equipment
Immersion Circulator: The heart of sous vide cooking, this device clips to your container and maintains precise water temperature. The Anova Precision Cooker 3.0 ($149-199) offers 1100 watts of heating power, Wi-Fi connectivity, and handles up to 10 gallons of water—sufficient for full packer briskets. The Breville Joule ($199-249) provides faster heating with 1100 watts in a compact design but requires smartphone control with no manual buttons. Budget options like the Inkbird ($89-119) work adequately for occasional cooking but may struggle maintaining temperature in large water volumes. For more equipment recommendations, explore our best kitchen appliances collection.
Large Container or Pot: A full brisket flat (4-6 lbs) requires minimum 12-quart capacity, while whole packer briskets (12-16 lbs) need 18-22 quart containers. Dedicated sous vide containers include lids with circulator cutouts and reduce evaporation, but large stockpots or plastic storage bins work equally well. Ensure your container depth allows full brisket submersion plus 2-3 inches of water above the bag.
Vacuum Sealer or Ziplock Bags: Chamber vacuum sealers ($300-800) provide commercial-grade sealing and handle liquids better than edge sealers. Budget-friendly FoodSaver-style edge sealers ($50-120) work well for brisket since minimal liquid is present during sealing. According to food safety experts, commercial sous vide operations should use pouches with no oxygen transfer rate and high temperature ratings. For occasional sous vide cooking, gallon-size freezer Ziplock bags combined with the water displacement method (submerging sealed bag slowly to force air out) costs under $10 and produces reliable results. Vacuum sealers are incredibly versatile—they’re essential for our batch cooking and preservation methods as well.
Brisket Selection: Flat cuts (4-6 lbs) cost $4-6 per pound, contain less fat, slice more uniformly, and fit easily in standard containers. Point cuts (5-8 lbs) run $5-7 per pound, offer superior marbling, and create better burnt ends but require larger cooking vessels. Whole packer briskets (12-16 lbs) provide best value at $3-4 per pound but challenge most home sous vide setups due to size constraints.
Optional but Recommended Equipment
A smoker, grill, or oven is essential for the finishing step that develops flavorful bark on your brisket exterior. Pellet smokers excel at this task, providing smoke flavor and high heat simultaneously. Gas or charcoal grills work well, as do conventional ovens set to 450°F. An instant-read thermometer like the ThermoWorks ThermaPen or the wireless Meater Plus helps verify finishing temperature, though it’s less critical than with traditional cooking since the brisket is already fully cooked from sous vide. For more on temperature monitoring tools, see our smart kitchen tools guide.
Large coolers serve dual purposes—pre-chilling for the ice bath method and holding finished brisket at serving temperature for hours. Kitchen torches ($25-40) allow spot-searing specific areas for enhanced crust but can’t replace full finishing methods for developing proper bark across the entire surface.
Flat Cut vs Point Cut: Which Brisket Should You Buy?
Brisket consists of two distinct muscles: the flat (or “first cut”) and the point (or “deckle”). Understanding their differences helps you choose the right cut for your brisket sous vide recipe and budget.
Flat Cut Characteristics: This rectangular, uniform muscle contains less marbling and fat, making it easier to slice into clean, consistent portions. Flat cuts typically weigh 4-6 pounds and fit comfortably in standard 12-quart sous vide containers. The leaner composition means flat cuts can become dry if overcooked traditionally, but sous vide’s moisture retention makes them reliably tender. Expect to pay $4-6 per pound at most grocery stores, with prime grade flats reaching $7-9 per pound.
Point Cut Characteristics: The triangular point cut contains significantly more intramuscular fat and marbling, resulting in richer flavor and more forgiving cooking. These cuts weigh 5-8 pounds and may require larger containers or trimming to fit standard setups. The extra fat renders beautifully during 30+ hour sous vide cooks, creating exceptionally juicy results ideal for burnt ends. Point cuts cost $5-7 per pound for choice grade, with limited availability at standard grocery stores—butcher shops and warehouse clubs offer better selection.
Whole Packer Briskets: Purchasing both muscles together (12-16 lbs total) provides best value at $3-4 per pound but creates cooking challenges. Most whole packers don’t fit in home sous vide containers without significant trimming. Some cooks separate the muscles and cook them individually, adjusting times based on thickness—the thinner flat often needs 24-28 hours while the thicker point benefits from 32-36 hours at 155°F.
| Cut Type | Weight | Fat Content | Price/lb | Best Uses | Container Size Needed |
|---|---|---|---|---|---|
| Flat | 4-6 lbs | Low-moderate | $4-6 | Clean slicing, sandwiches | 12+ quarts |
| Point | 5-8 lbs | High | $5-7 | Burnt ends, rich flavor | 16+ quarts |
| Whole Packer | 12-16 lbs | Variable | $3-4 | Maximum value, advanced cooks | 22+ quarts |
Trimming for Sous Vide: Unlike traditional smoking where thick fat caps protect meat from drying, sous vide brisket benefits from trimming the fat cap to approximately 1/4 inch thickness. Excessive fat prevents seasoning penetration and creates greasy bag liquid without adding flavor. Remove any hard fat deposits and silverskin from the bottom surface, as these won’t render even during extended sous vide cooking.
Step-by-Step: How to Make Sous Vide Brisket
Step 1: Prepare the Brisket
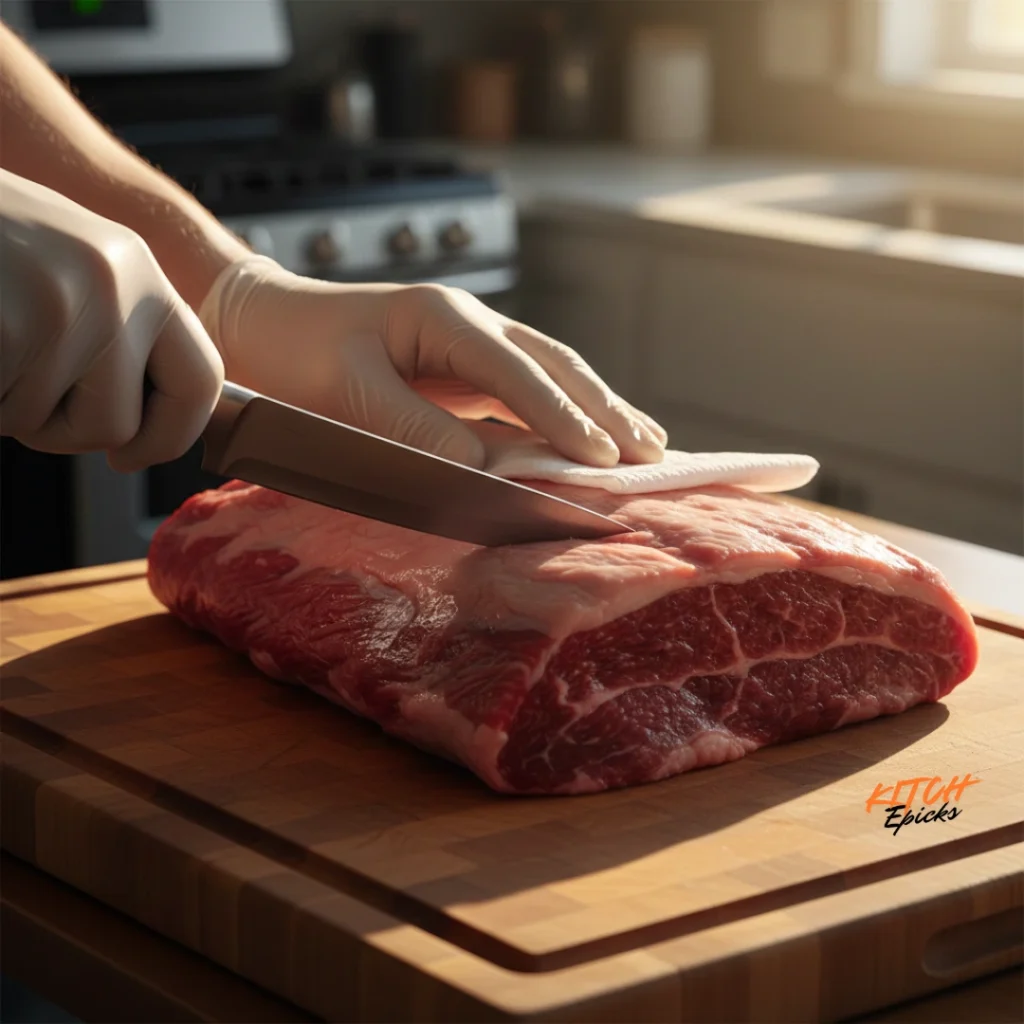
Remove your brisket from refrigeration 30-60 minutes before cooking to allow it to approach room temperature, which promotes more even initial heating. Trim the fat cap to 1/4 inch thickness using a sharp boning knife, removing any hard white fat deposits that won’t render during cooking. Trim away silverskin from the bottom surface by sliding your knife underneath and lifting while cutting parallel to the meat.
Pat the entire brisket completely dry with paper towels, paying special attention to crevices where moisture accumulates. Excess surface moisture dilutes seasoning and prevents proper rub adhesion. Inspect for any remaining bone fragments or cartilage, particularly near the point section, and remove these with your knife tip.
Step 2: Season Generously

Classic Texas-style brisket rub consists of 50% coarse black pepper and 50% coarse kosher salt, applied liberally to all surfaces. Use approximately 2 tablespoons of this mixture per pound of brisket—what seems like excessive seasoning at first will taste perfect after 30+ hours of cooking. The salt penetrates deeply during extended sous vide times, seasoning the interior while the pepper creates a flavorful crust base for finishing.
Alternative rub options include adding 2 tablespoons granulated garlic, 1 tablespoon smoked paprika, and 1 tablespoon brown sugar to the base salt-pepper mixture for more complex flavor. Avoid rubs containing excessive sugar, as these can burn during high-heat finishing and create bitter flavors. Press the rub firmly into the meat surface to ensure adhesion.
Apply seasoning 2-4 hours before bagging to allow salt to partially penetrate, or season immediately before sealing if time is limited. Extended dry-brining (12-24 hours) works well for traditional cooking but offers minimal benefits for sous vide since the vacuum-sealed environment promotes rapid seasoning distribution.
Step 3: Vacuum Seal
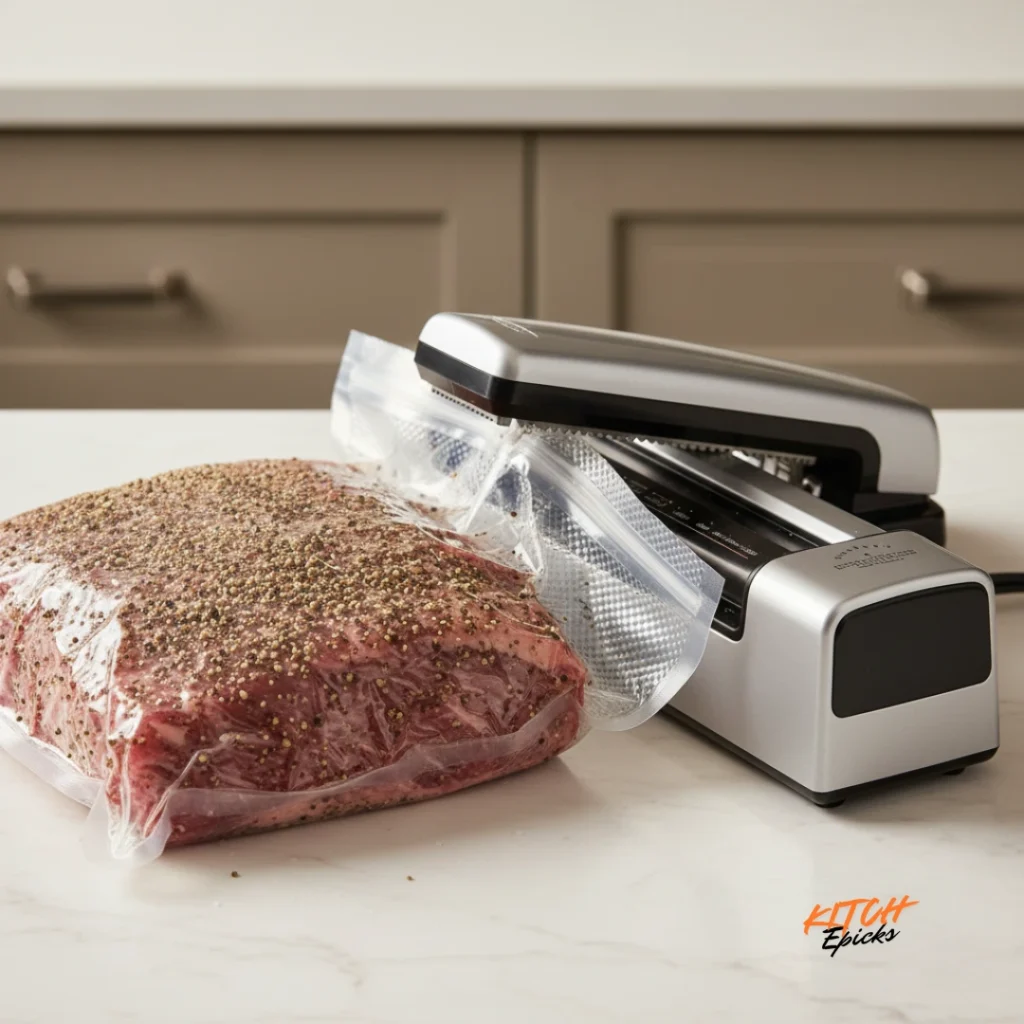
Place the seasoned brisket in an appropriately sized vacuum bag, ensuring at least 3-4 inches of extra bag material beyond each end for proper sealing. Position the brisket flat rather than folded to promote even cooking and prevent creating thick spots that require extended times. If your brisket is too large for your bags, either cut it in half or use two bags sealed together.
When using a vacuum sealer, stop the vacuum process just as the bag tightens around the meat but before it crushes the surface or pulls away seasoning. Seal immediately at this point—excessive vacuum pressure can compress the meat fibers and affect texture. For chamber vacuum sealers, use full vacuum settings as these systems prevent the crushing issues common with edge sealers.
Water Displacement Method for Ziplock Bags: If using freezer-weight Ziplock bags, place the seasoned brisket inside and seal the bag except for 1-2 inches at one corner. Slowly submerge the bag in your water bath, allowing water pressure to force air out through the opening. Just before the opening goes underwater, seal this final section closed. The water pressure keeps the bag tightly sealed against the meat throughout cooking.
Double-bagging provides insurance against leaks during 30+ hour cooking sessions. Simply place your sealed bag inside a second bag and seal the outer layer. This precaution prevents entire cook loss if the inner seal fails.
Step 4: Set Up Water Bath
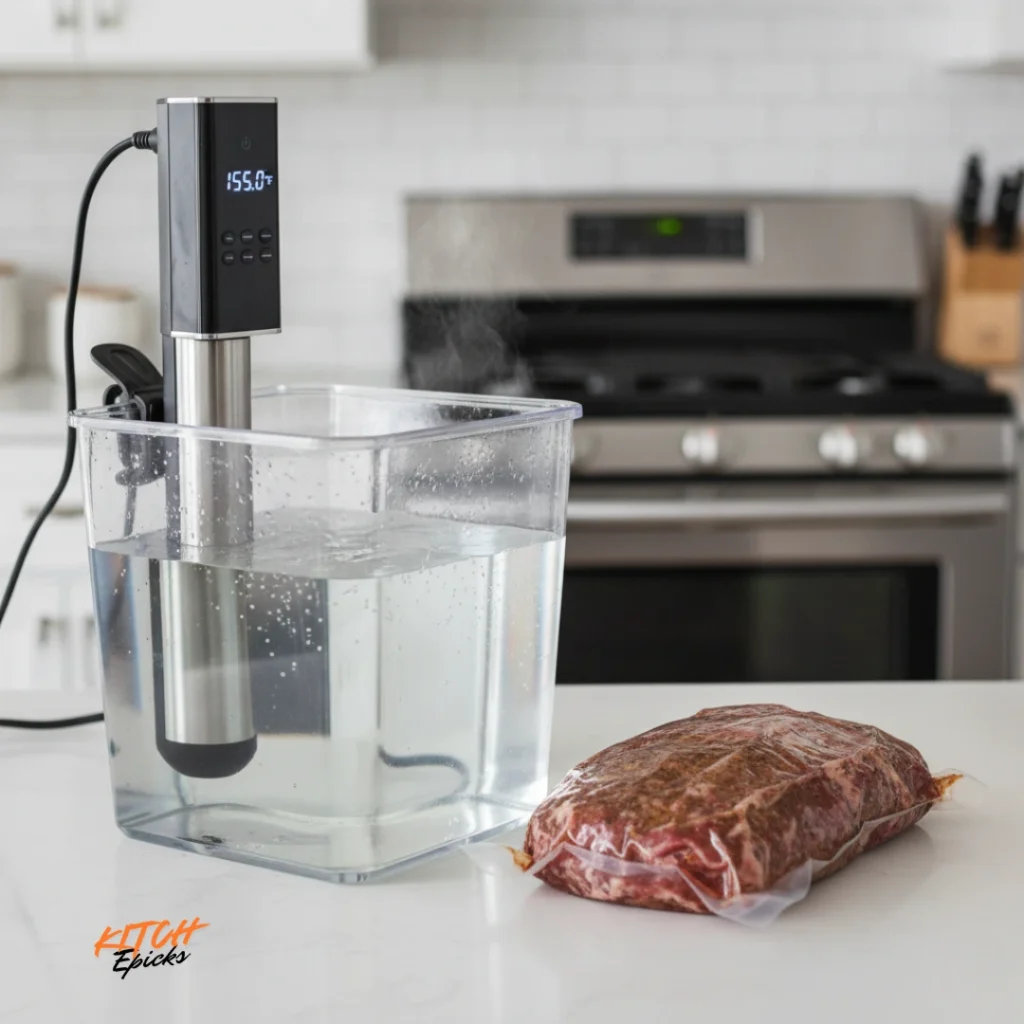
Fill your container with hot tap water (120-140°F if available) to reduce preheating time, leaving 2-3 inches of space at the top to account for displacement when you add the brisket. Attach your immersion circulator to the container edge, ensuring the water level falls between the minimum and maximum fill lines marked on the device.
Set your target temperature—155°F is recommended for first-time sous vide brisket recipe cooks as it provides the most forgiving results. Allow the water bath to preheat for 15-20 minutes until the circulator indicates it has reached the target temperature. Water circulation should create visible movement across the surface, confirming proper heat distribution.
Step 5: Cook
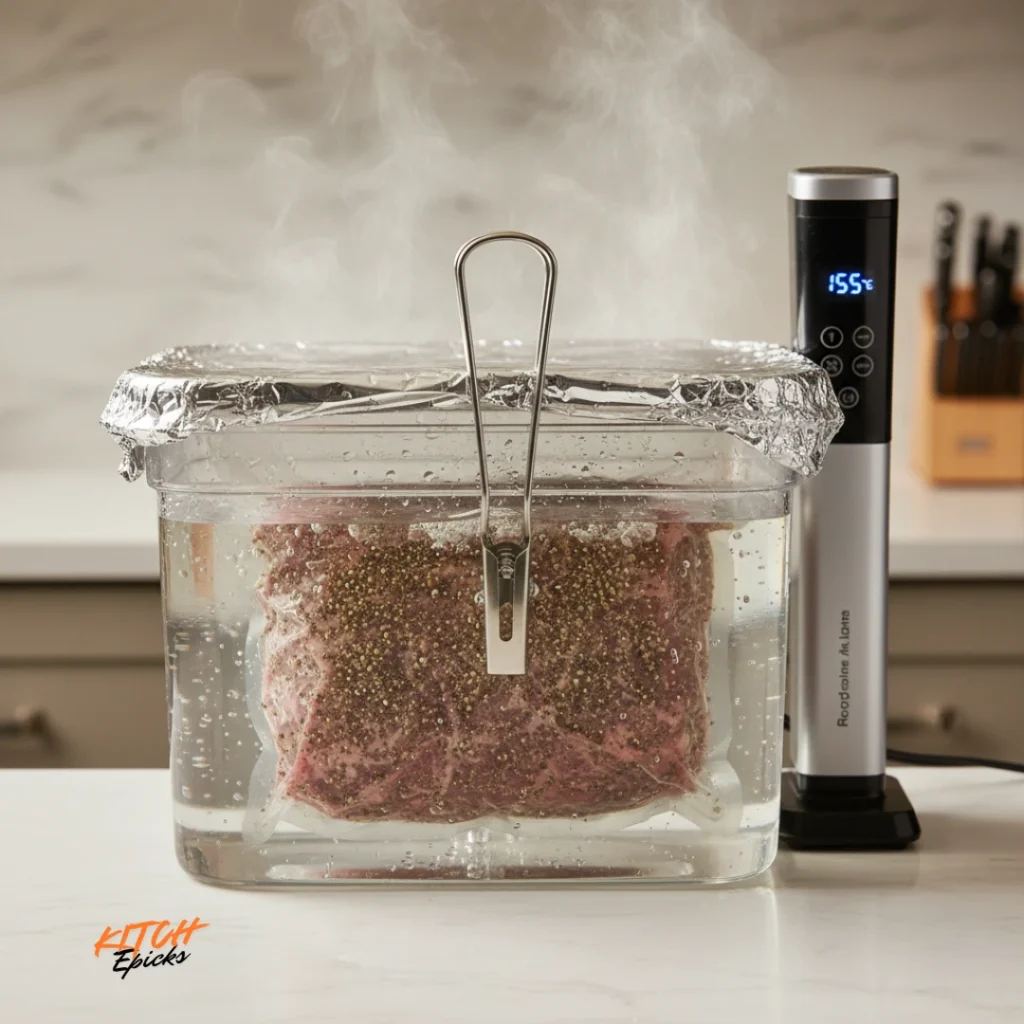
Gently lower the bagged brisket into the preheated water bath, ensuring it becomes fully submerged. If the bag floats due to any remaining air pockets, use a heavy spoon or specialized sous vide weight to hold it underwater—even small exposed portions won’t cook properly. Clip the bag opening to the container edge if needed for stability, but ensure the clip doesn’t create strain that might tear the seal.
Set a timer for your target cooking duration—30 hours at 155°F works well for most 4-6 pound brisket flats. The exact start time isn’t critical since sous vide offers a 6-8 hour flexibility window. Cover your container with plastic wrap, aluminum foil, or a fitted lid to minimize water evaporation during the extended cook.
Check water levels every 12 hours, adding hot tap water if the level approaches the circulator’s minimum line. Water loss occurs primarily through evaporation, with covered containers losing minimal volume. If you notice the bag floating at any point, investigate for developing air pockets from rendered fat and reposition or clip as needed.
Safe cooking times at 155°F range from 24-42 hours, with most briskets reaching optimal texture between 30-36 hours according to ChefSteps’ comprehensive time and temperature research. Flat cuts on the shorter end of this range (24-30 hours) while fatty point cuts benefit from 32-36 hours for complete fat rendering.
Step 6: Ice Bath (Optional but Recommended for Advance Prep)
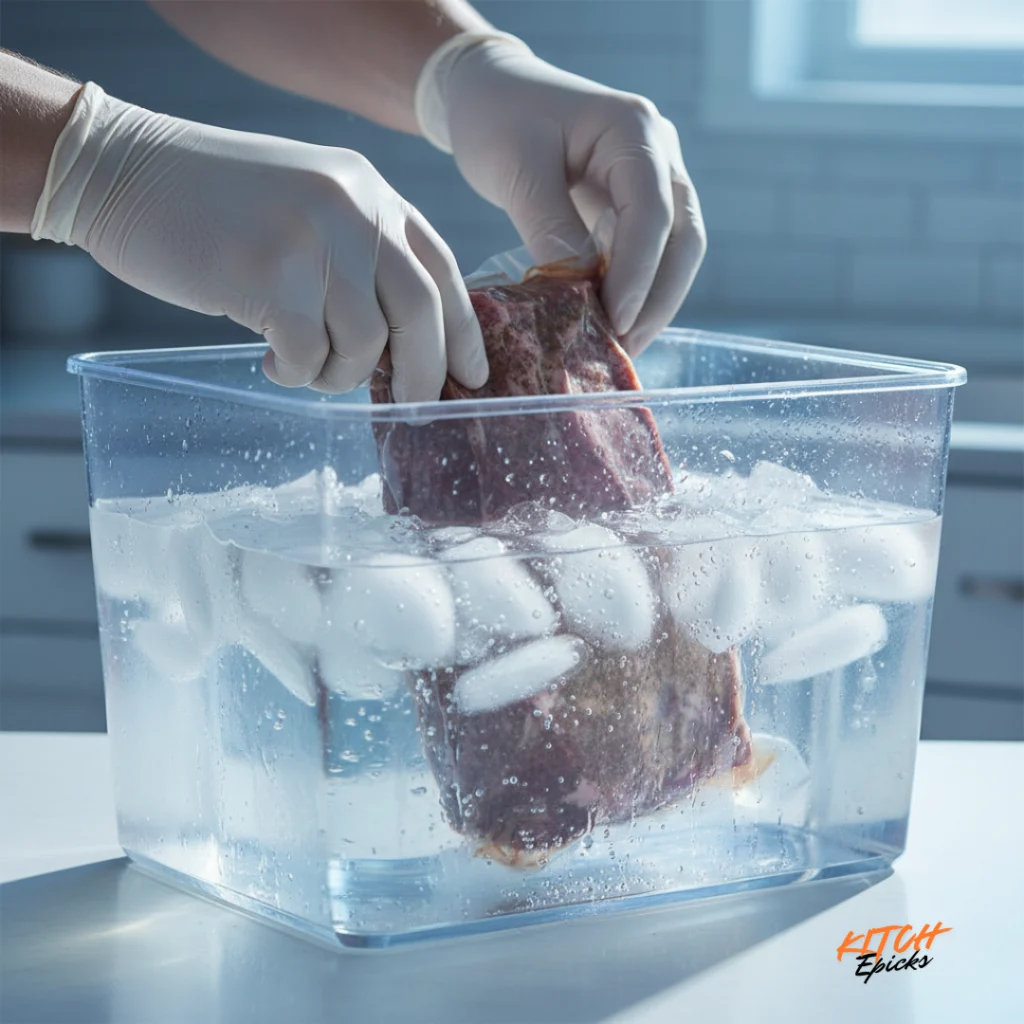
If cooking ahead of your serving time, rapidly chill the sealed brisket in an ice bath immediately after removing it from the water bath. Fill a large container or cooler with equal parts ice and cold water, then submerge the bagged brisket for 45-60 minutes until the internal temperature drops below 40°F.
Once chilled, refrigerate the sealed brisket for up to 5 days before finishing. This advance preparation allows you to complete the time-consuming sous vide step days before your event, then finish the brisket in 45-60 minutes when needed. According to the FDA Food Code, sous vide packaging involves vacuum-sealed food that is cooked in the bag, rapidly chilled, and refrigerated at temperatures that inhibit pathogenic growth. To reheat before finishing, place the cold bagged brisket in a 140°F water bath for 45-60 minutes until warmed through.
Step 7: Finish for Bark
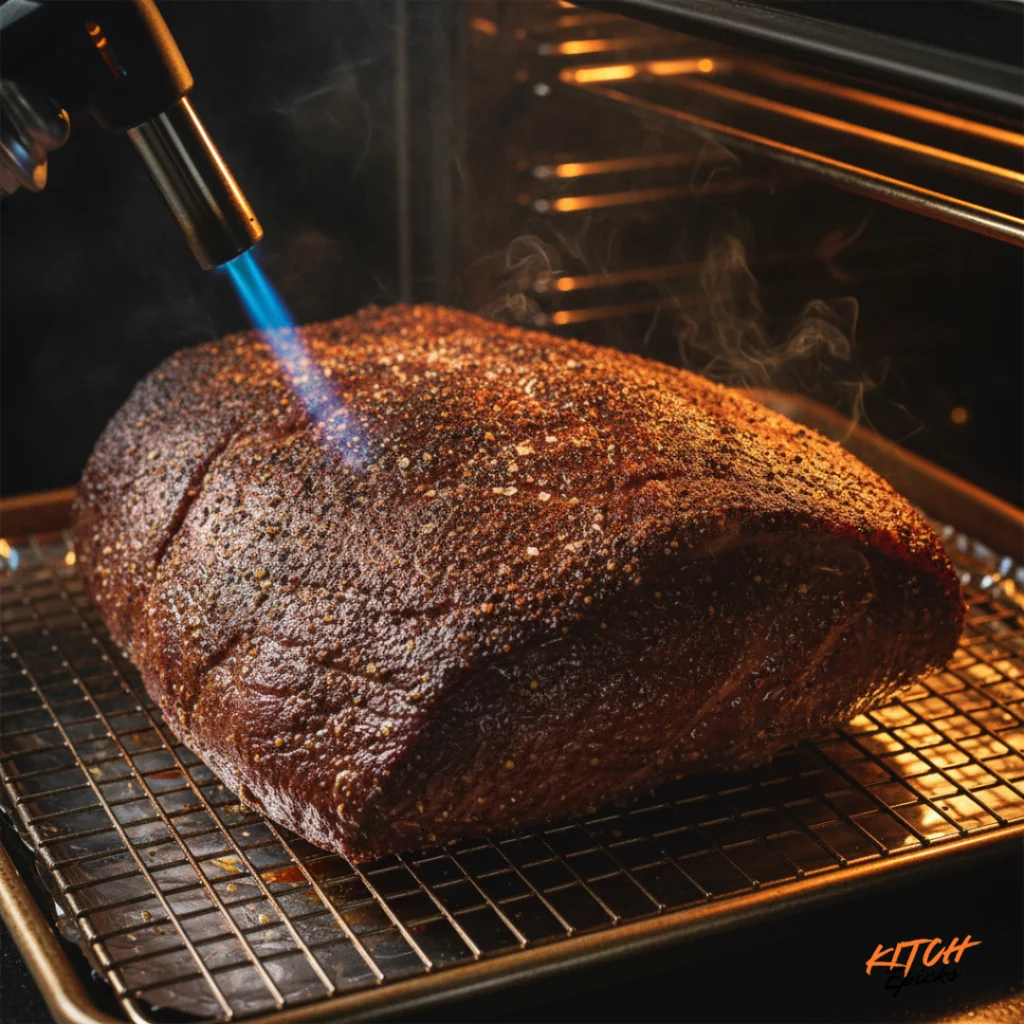
The finishing step is absolutely critical—sous vide brisket straight from the bag looks grey and unappetizing, lacking the flavorful crust that defines great brisket. Remove the brisket from its bag and pat the surface completely dry with paper towels, as any remaining moisture prevents bark formation. Reserve the bag liquid if desired for sauce or gravy, though it will be thin and require reduction.
Optionally apply additional rub at this stage for enhanced crust flavor and appearance. The dry brisket surface readily accepts fresh seasoning, which toasts during finishing to create complex flavors. See the next section for detailed finishing method instructions.
Finishing Methods: Creating the Perfect Bark
Method 1: Smoker Finish (Best Flavor for Sous Vide Smoked Brisket)
Preheat your smoker to 275-300°F using wood chunks or pellets—oak provides classic Texas flavor, while hickory and mesquite offer stronger smoke characteristics according to AmazingRibs.com’s BBQ authority Meathead Goldwyn. Place the dried brisket directly on the smoker grate fat-side up, adding a few additional rubs if desired for enhanced crust.
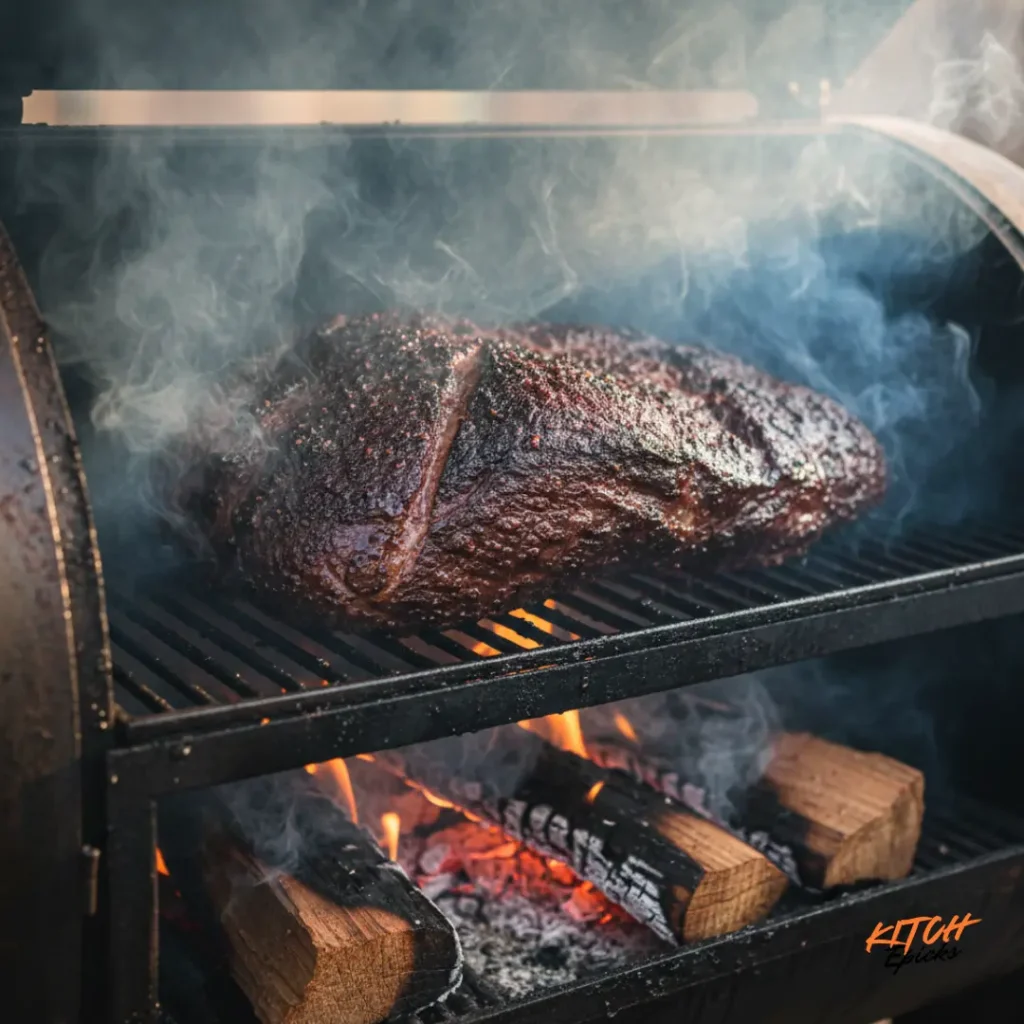
Smoke for 45-90 minutes until a dark mahogany bark develops across all surfaces. The brisket is already fully cooked from sous vide, so this step focuses entirely on flavor and texture development rather than internal temperature. Check every 20-30 minutes, rotating if needed for even bark formation.
Target final internal temperature of 150-160°F measured with an instant-read thermometer in the thickest section. The brisket warms from its sous vide temperature while developing smoke flavor penetration up to 1/4 inch deep. This sous vide smoked brisket hybrid method delivers superior consistency compared to traditional 12-hour smoking while maintaining authentic smoke flavor.
Method 2: Oven Finish (Most Convenient)
Preheat your oven to 450°F and position a wire cooling rack over a rimmed baking sheet. The elevated rack allows air circulation around the entire brisket, promoting even bark development on all surfaces. Line the baking sheet with foil for easier cleanup since rendered fat will drip during finishing.

Place the dried brisket on the rack fat-side up and roast for 30-45 minutes, checking at 30 minutes for bark development. The high heat creates a crust through Maillard reactions similar to traditional smoking, though without smoke flavor. Brush the surface with melted beef tallow or butter halfway through for enhanced browning and flavor.
Switch to the broiler for the final 3-5 minutes, watching carefully to prevent burning. The intense overhead heat creates additional caramelization and crispness, but can quickly go from perfect to burnt. Broil with the oven door slightly ajar and rotate the pan every minute for even results.
Method 3: Grill Finish
Set up your gas or charcoal grill for two-zone cooking with one side at high heat (450-500°F direct) and the other at medium heat (300-350°F indirect). This configuration allows you to develop bark over direct heat while preventing burning by moving the brisket to indirect zones as needed.
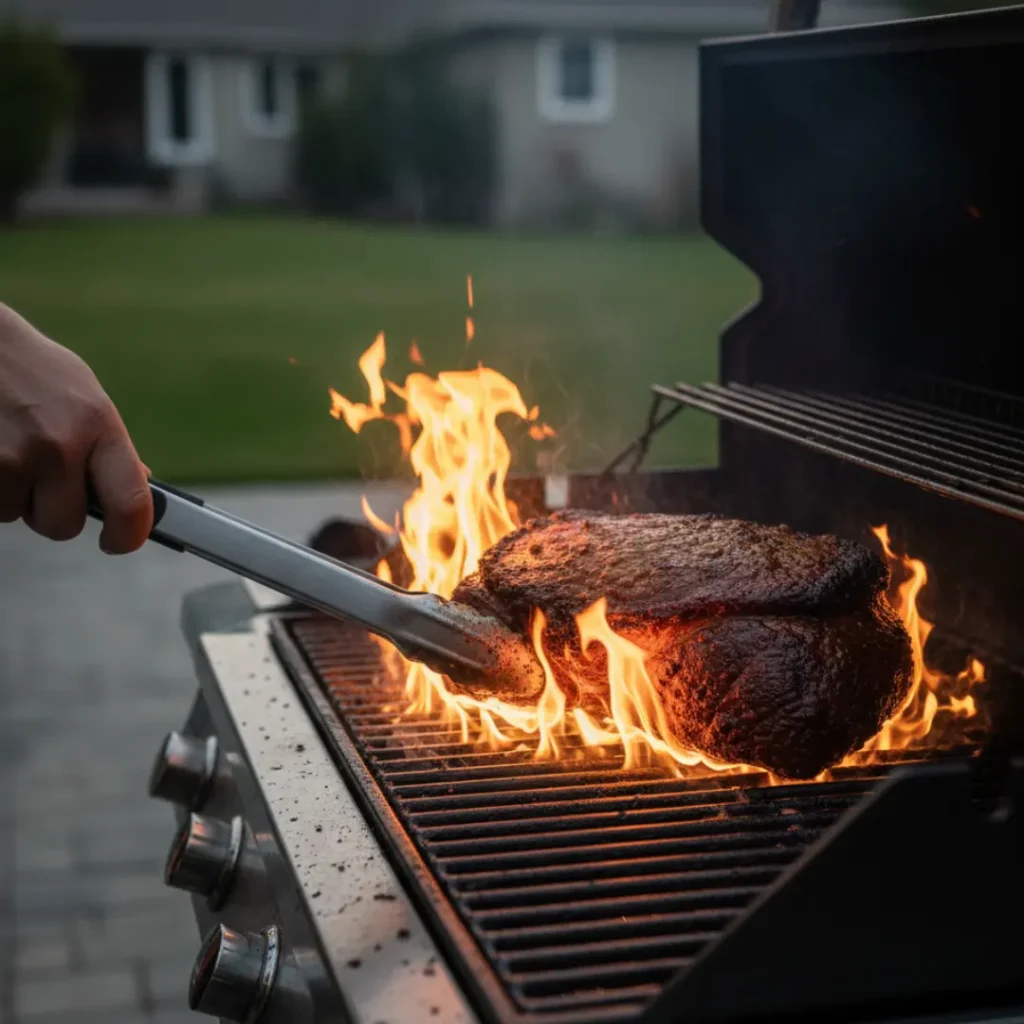
Start the dried brisket over direct heat fat-side down for 8-10 minutes to develop initial crust, then flip and cook fat-side up for another 8-10 minutes. Watch for flare-ups caused by rendered fat dripping onto flames or coals—move the brisket temporarily to indirect heat if flames appear.
Move to indirect heat for the remaining 20-30 minutes to finish bark development without risk of burning. Total grill finishing time runs 35-50 minutes depending on your grill temperature and brisket thickness. Close the lid between checks to maintain consistent heat and promote smoke circulation if using charcoal.
Method 4: Torch Finish (Quick Option)
Kitchen torches or small propane torches can spot-sear the brisket exterior when other finishing methods aren’t available. Pat the brisket completely dry and apply fresh rub, then systematically torch the surface in overlapping passes 2-3 inches from the flame. Work slowly across all surfaces, holding the torch at each spot for 3-5 seconds until the rub darkens and caramelizes.
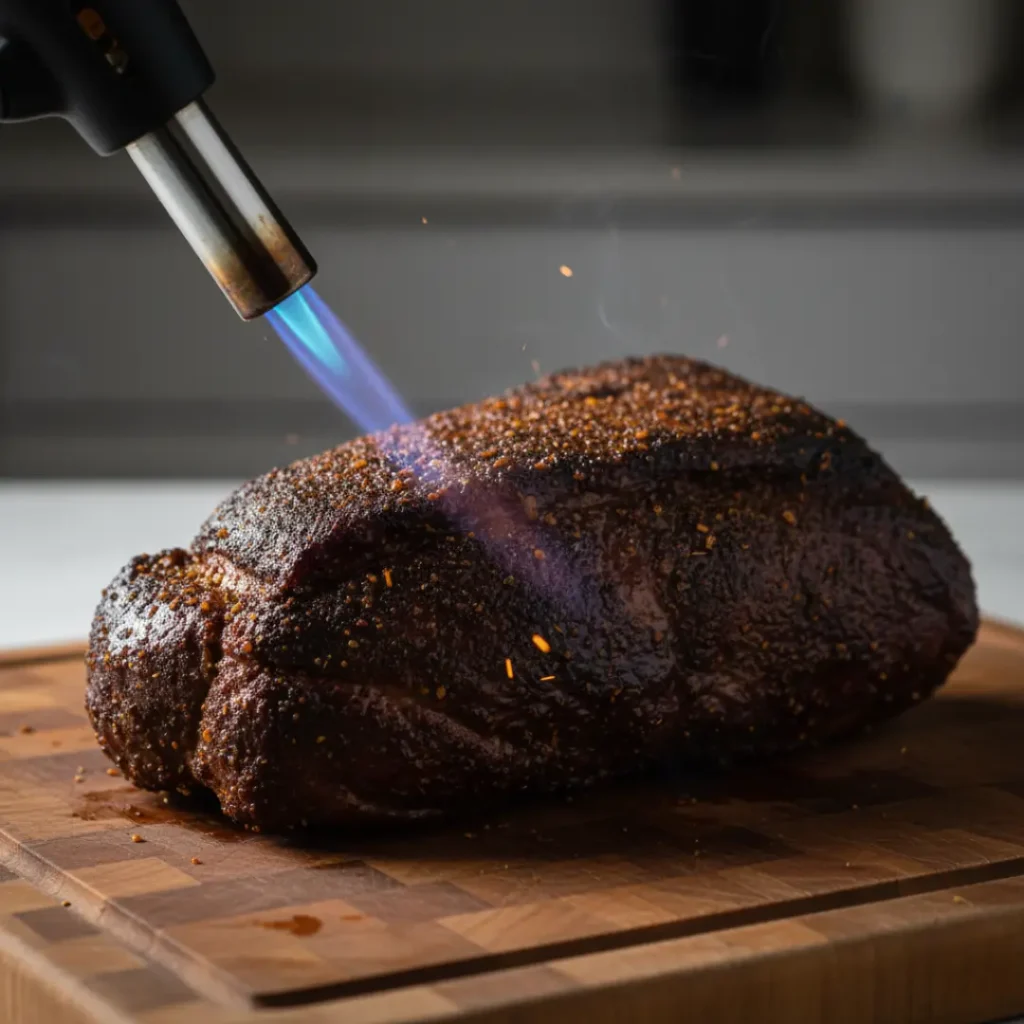
Torch finishing creates localized crusts but can’t replicate the deep bark development from oven, grill, or smoker methods. The surface dries and browns, but without sustained heat exposure, the underlying layers don’t develop the same complex flavors. Consider torching as supplemental finishing after oven roasting rather than a complete standalone method.
Slicing and Serving Your Sous Vide Brisket
Allow the finished brisket to rest for 10-15 minutes after removing from heat, giving surface temperatures time to equalize and preventing excessive juice loss when slicing. Place the brisket on a cutting board with a juice groove to catch any released liquids.
Identify the grain direction by examining the muscle fiber orientation—fibers run lengthwise on the flat but change direction at the point. Slicing against the grain (perpendicular to fiber direction) shortens muscle fibers and creates tender bites that don’t require excessive chewing. Mark the grain direction with a small knife score before slicing if you’re concerned about losing track.

Use a sharp slicing knife or carving knife to cut 1/4-inch thick slices perpendicular to the grain. Thinner slices (1/8 inch) work well for sandwiches, while thicker cuts (3/8 inch) better showcase the bark and work for plated presentations. If your brisket includes both flat and point sections, separate them at the natural fat seam before slicing since the grain runs different directions.
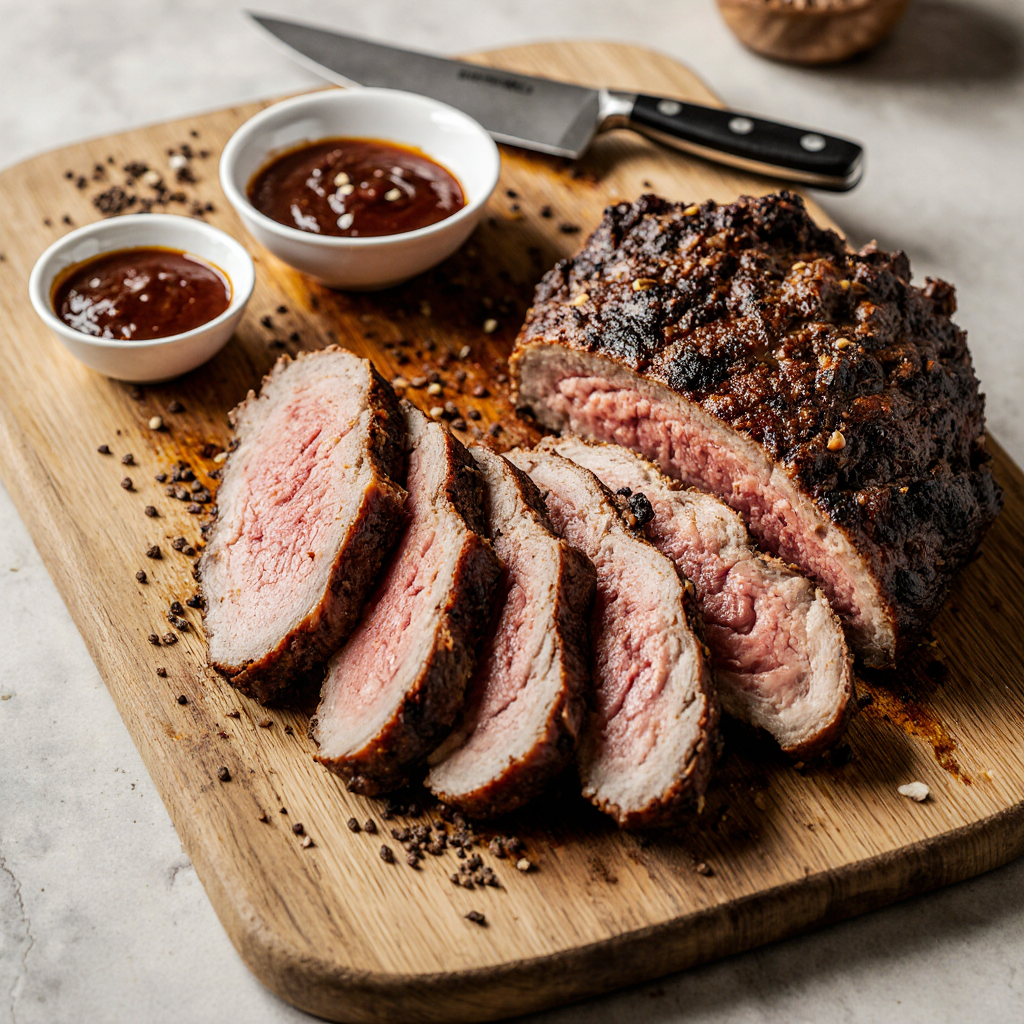
Serve immediately while hot for peak texture and flavor. Arrange slices on a platter with the bark side visible, slightly overlapping for attractive presentation. Traditional accompaniments include white bread, pickles, onions, and BBQ sauce, though high-quality sous vide brisket needs minimal enhancement.
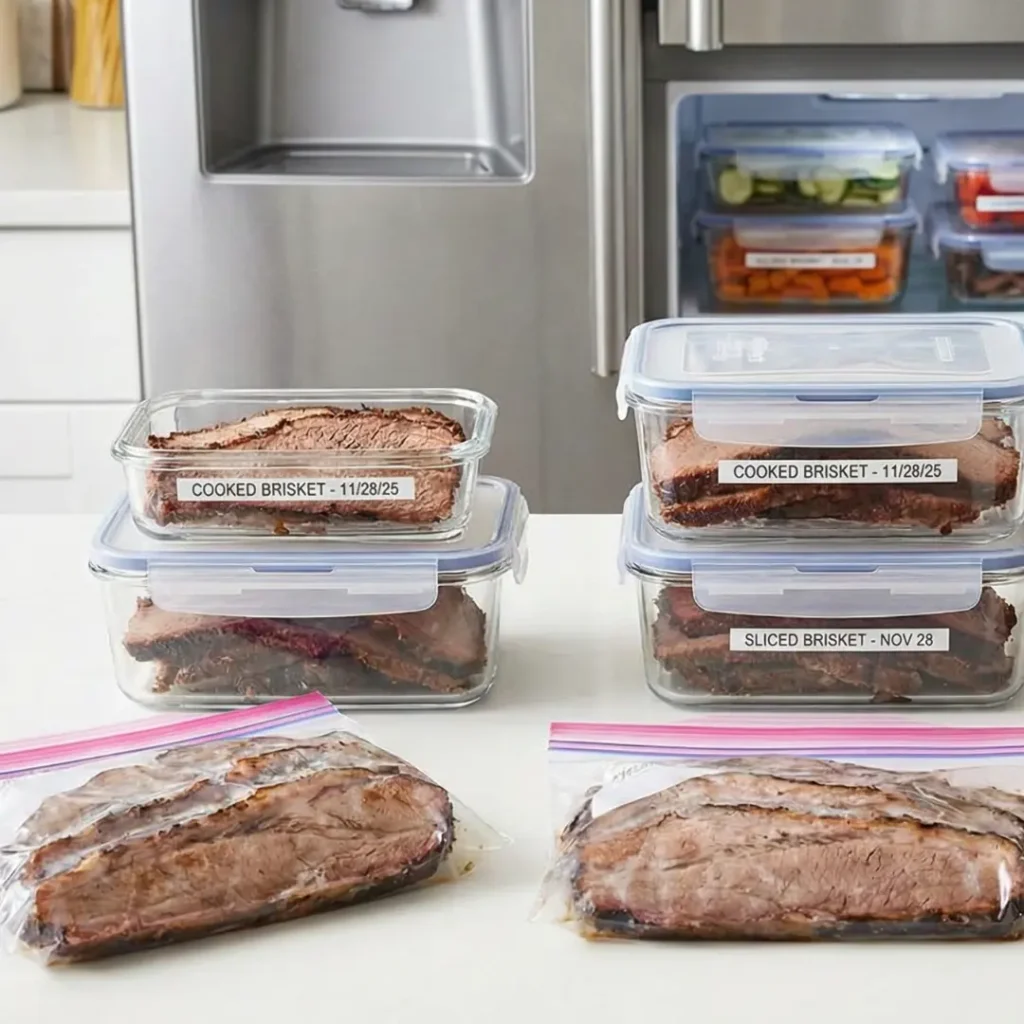
Leftover Storage: Cool leftover brisket to room temperature within 2 hours, then refrigerate in airtight containers for 4-5 days. Vacuum sealing leftovers extends refrigerator life to 7 days. For longer storage, freeze sliced brisket in vacuum bags or freezer-weight Ziplock bags for up to 3 months. Reheat refrigerated slices in a 300°F oven wrapped in foil for 15-20 minutes, or microwave individual portions for 60-90 seconds at 50% power.
Troubleshooting: Common Sous Vide Brisket Problems
Problem 1: Brisket Is Still Tough

Tough results typically indicate insufficient cooking time or too-low temperature for the specific cut. Lean flat cuts cooked at 135°F for only 24 hours often remain chewy since collagen hasn’t fully converted to gelatin. Solutions include returning the sealed brisket to a 155°F water bath for an additional 6-12 hours, or starting over with higher temperature settings for future cooks.
Point cuts with extensive marbling sometimes require 36+ hours at 155°F for fat to fully render and connective tissue to break down. If your brisket feels tough despite following timing guidelines, it likely had more connective tissue than average—extend cooking time rather than increasing temperature beyond 165°F.
Problem 2: Brisket Is Mushy or Falls Apart

Excessively soft, mushy texture results from cooking too long at high temperatures, typically beyond 48 hours at 155°F. Muscle fibers break down completely, and the brisket loses structural integrity. While still edible, overly soft brisket doesn’t slice cleanly and may feel unpleasant texturally.
Prevent mushy results by reducing cooking time to the 24-36 hour range at 155°F, or switching to 135°F for 40-45 hours if you prefer firmer, sliceable texture. Lean flat cuts particularly suffer from excessive cooking times since they lack fat to maintain moisture and structure during breakdown.
Problem 3: No Bark or Flavorless Crust
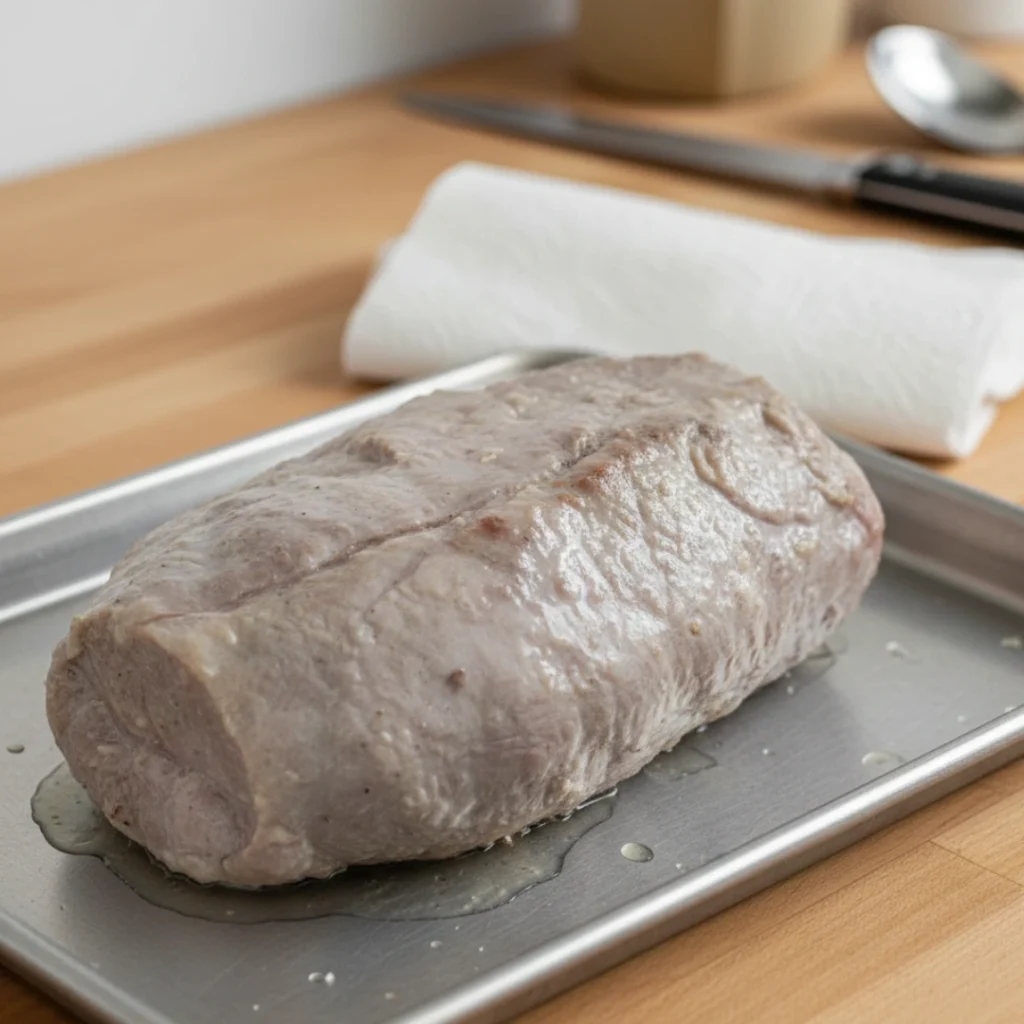
Weak or missing bark almost always traces to inadequate drying before finishing or insufficient finishing time. Moisture on the brisket surface prevents Maillard browning reactions and creates steam rather than crust. Always pat the brisket completely dry with paper towels, then allow it to air-dry for 5-10 minutes before applying heat.
Increase finishing time from 30 minutes to 60-90 minutes if bark remains pale or thin. Higher temperatures (450-500°F) work better than moderate heat for developing deep crust, though they require more careful monitoring. Applying additional rub before finishing significantly enhances bark flavor and appearance.
Problem 4: Bag Floats During Cooking
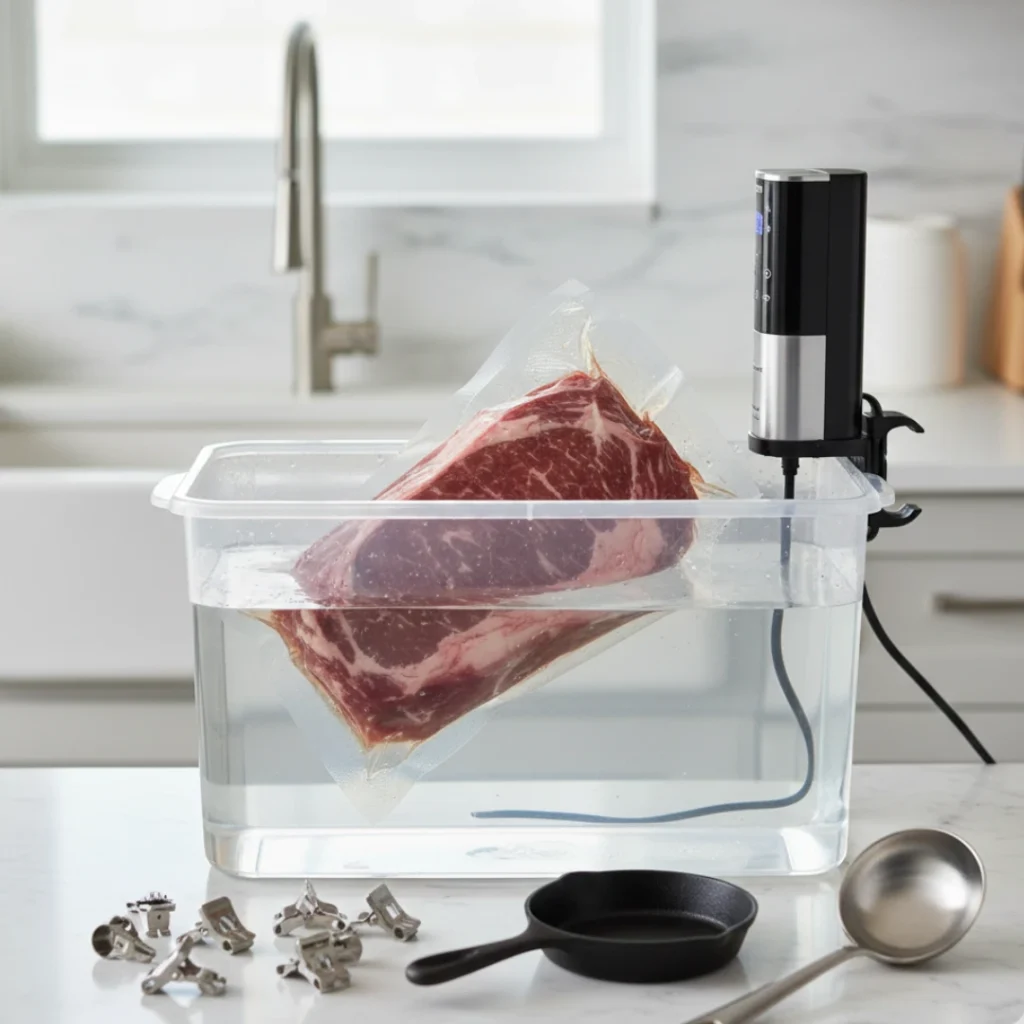
Floating bags indicate trapped air pockets that prevent proper water contact and even cooking. Remove the bag, carefully unseal one corner, and use the water displacement method again to release additional air. Reseal and resubmerge, using a clip or weight to keep the bag fully underwater.
Some floating occurs naturally as fat renders and creates small air bubbles within the bag. If your brisket cooked 20+ hours before floating began, the cooking is largely complete and minor floating won’t significantly impact results. For future cooks, ensure thorough air removal during initial sealing.
Problem 5: Bland Flavor

Under-seasoned brisket results from either insufficient rub application or skipping the finishing step entirely. Remember that sous vide brisket needs generous seasoning—approximately 2 tablespoons of rub per pound of meat. The sealed environment means seasonings don’t concentrate through evaporation like traditional cooking.
The finishing step contributes substantial flavor through Maillard reactions, smoke absorption, and caramelization. Sous vide brisket served directly from the bag tastes bland and looks unappealing regardless of seasoning. Never skip finishing—it transforms good brisket into great brisket.
Problem 6: Water Evaporated During Long Cook
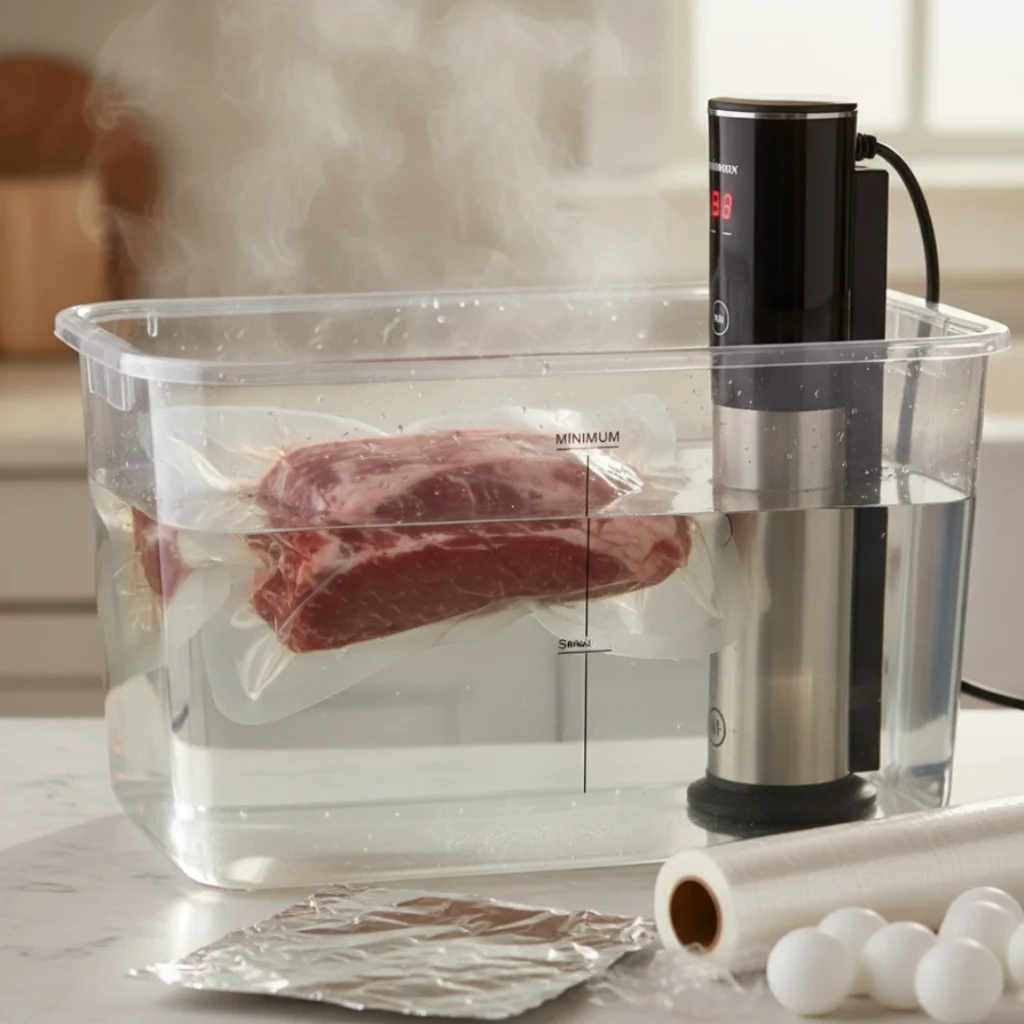
Evaporation during 30+ hour cooks can lower water levels below circulator minimums, causing equipment shutdowns. Cover your container with plastic wrap, aluminum foil, or fitted lids to dramatically reduce evaporation. Ping pong balls floating on the water surface also minimize evaporation while allowing circulator operation.
Check water levels every 12 hours during extended cooks, adding hot tap water as needed to maintain proper levels. Set phone reminders to ensure you don’t forget overnight checks. If you discover the circulator stopped due to low water, refill immediately, verify temperature recovery, and add the shutdown duration to your total cook time.
Sous Vide Brisket vs Traditional Smoked Brisket
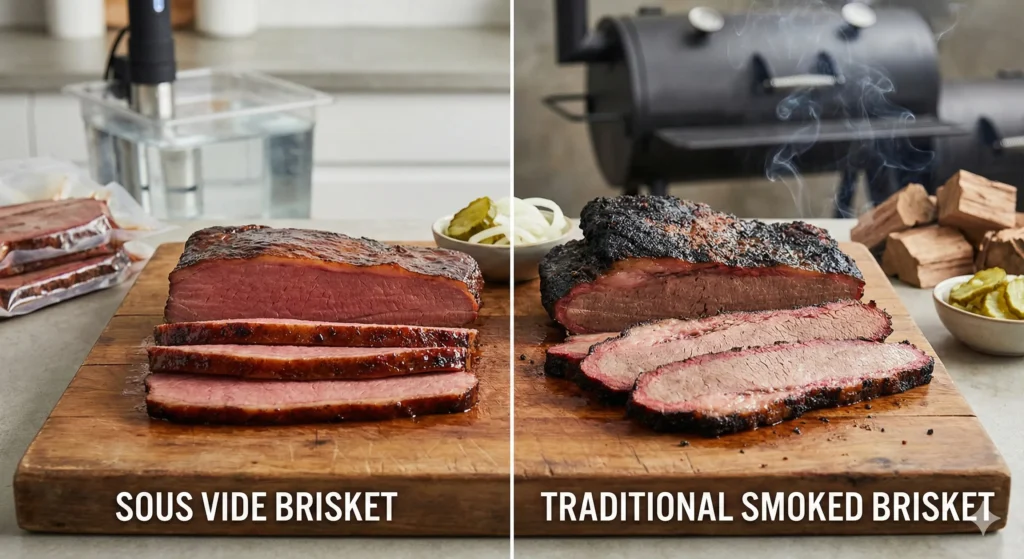
| Factor | Sous Vide Brisket | Traditional Smoked Brisket |
|---|---|---|
| Total Cook Time | 24-36 hours | 12-16 hours |
| Hands-On Time | 30-45 minutes | 3-5 hours |
| Difficulty Level | Easy (beginner-friendly) | Advanced (experience needed) |
| Consistency | Very high (repeatable results) | Variable (weather, equipment dependent) |
| Smoke Flavor | Moderate (if finished on smoker) | Excellent (deep smoke penetration) |
| Tenderness | Guaranteed (precise temp control) | Variable (skill-dependent) |
| Equipment Cost | $100-250 (circulator + basic setup) | $300-2,000+ (quality smoker) |
| Risk of Failure | Very low (nearly foolproof) | Moderate (temperature spikes, stalls) |
| Fuel/Energy Cost | $2-4 (electricity for 36 hours) | $15-30 (charcoal, wood, pellets) |
| Best Use Case | Consistent results, indoor cooking, convenience | Maximum smoke flavor, outdoor cooking, tradition |
The “sous-vide-que” hybrid approach combines both methods’ strengths—precision sous vide cooking for 30 hours at 155°F, followed by 60-90 minutes of smoking at 275°F for bark and smoke flavor. This technique delivers the consistency and tenderness of sous vide while capturing authentic BBQ flavor characteristics that finishing in an oven can’t replicate.
Traditional smoking remains superior for maximum smoke penetration and authentic Texas BBQ experience, particularly for competition-level cooking. However, sous vide produces more consistent results with significantly less effort, making it ideal for home cooks who want restaurant-quality brisket without mastering complex temperature management skills.
Cost Analysis: Is Sous Vide Brisket Worth It?
Initial equipment investment for sous vide brisket ranges from $150-400 depending on quality choices. A reliable Anova Precision Cooker ($150-200) plus vacuum sealer ($60-120), bags ($15), and container ($20-30) totals approximately $245-370 for a complete setup. Budget approaches using Ziplock bags and existing stockpots reduce startup to under $200.
Electricity costs for 36-hour sous vide cooking at 155°F average $2-4 depending on local utility rates and ambient temperature. The immersion circulator draws 800-1100 watts initially to heat water, then cycles on/off to maintain temperature using approximately 100-200 watts average. This energy efficiency far exceeds running a smoker for 12-16 hours or heating a conventional oven.
Brisket itself costs $3-7 per pound depending on cut and grade. A 5-pound choice grade flat at $5/pound totals $25, yielding 10-12 servings at $2-2.50 per serving. Sous vide’s near-perfect success rate prevents the costly failures common when learning traditional smoking—a burnt or undercooked $50-100 brisket represents significant waste that sous vide largely eliminates.
Time value considerations favor sous vide dramatically. Traditional smoking requires 3-5 hours of active monitoring, wood additions, and temperature adjustments over 12-16 hour cooks. Sous vide demands only 30 minutes of prep work and 5-minute water checks every 12 hours, freeing 2-4 hours of your time. For busy home cooks, this convenience alone justifies the equipment investment within 3-4 uses.
The equipment pays for itself after cooking 5-8 briskets when factoring in reduced failure rates, time savings, and consistent results. Sous vide circulators handle thousands of cooking hours and work for dozens of other applications beyond brisket, making them valuable long-term kitchen investments rather than single-purpose gadgets. Discover more versatile tools in our must-have kitchen gadgets for 2025 guide.
Sous Vide Brisket Recipe
Ingredients
Equipment
Method
- Remove brisket from refrigeration 30-60 minutes before cooking. Trim the fat cap to 1/4 inch thickness using a sharp boning knife, removing any hard white fat deposits. Trim away silverskin from the bottom surface.
- Pat the entire brisket completely dry with paper towels, paying special attention to crevices where moisture accumulates.
- Combine coarse black pepper, kosher salt, and optional seasonings (garlic and paprika). Apply liberally to all brisket surfaces, using approximately 2 tablespoons per pound. Press the rub firmly into the meat surface.
- Place the seasoned brisket in a vacuum seal bag or gallon Ziplock bag. If using a vacuum sealer, stop the vacuum just as the bag tightens around the meat. If using Ziplock, use the water displacement method by slowly submerging the bag to force out air, then seal.
- Fill a large container with hot tap water (120-140°F if available), leaving 2-3 inches at the top for displacement. Attach your immersion circulator and set to 155°F. Allow to preheat for 15-20 minutes.
- Gently lower the sealed brisket into the preheated water bath, ensuring it's fully submerged. Use a clip or weight if the bag floats. Cover the container with plastic wrap or foil to minimize evaporation.
- Cook for 30 hours at 155°F, checking water levels every 12 hours and adding hot water as needed. For advance meal prep, chill immediately in an ice bath after cooking and refrigerate for up to 5 days. Reheat in 140°F water bath for 45-60 minutes before finishing.
- Remove brisket from bag and pat the surface completely dry with paper towels. Any remaining moisture will prevent bark formation. Optionally apply additional rub for enhanced crust.
- Choose your finishing method: SMOKER: Smoke at 275-300°F for 45-90 minutes until dark bark forms. OVEN: Roast at 450°F for 30-45 minutes, broil last 3-5 minutes. GRILL: Cook over direct/indirect heat for 35-50 minutes total.
- Rest the finished brisket for 10-15 minutes. Identify the grain direction and slice 1/4" thick perpendicular to the grain. Serve immediately with traditional accompaniments like white bread, pickles, and BBQ sauce.
Notes
• For medium-rare sliceable texture: Cook at 135°F for 40-48 hours
• For balanced tenderness: Cook at 145°F for 30-40 hours
• For fall-apart tender: Cook at 155°F for 30-36 hours (recommended for beginners) Cut Selection:
• Flat cuts (4-6 lbs): Best for clean slicing, requires 24-30 hours
• Point cuts (5-8 lbs): More marbling, better for burnt ends, requires 32-36 hours
• Whole packer (12-16 lbs): Requires larger container or cutting into sections Storage:
• Refrigerate leftover brisket in airtight containers for 4-5 days
• Vacuum seal leftovers for up to 7 days refrigerated
• Freeze sliced brisket in vacuum bags for up to 3 months Troubleshooting:
• If brisket is tough: Increase cooking time by 6-12 hours or use higher temperature next time
• If bark is pale: Pat more thoroughly before finishing and extend finishing time to 60-90 minutes
• If bag floats: Remove air pockets using water displacement method again and clip bag underwater • No vacuum sealer? Use freezer-weight gallon Ziplock bags with water displacement method
• No smoker? Oven finishing at 450°F creates excellent bark without smoke flavor
Frequently Asked Questions About Brisket Recipe Sous Vide
Q: Can I sous vide a frozen brisket?
A: Yes, add 1-2 hours to your total cooking time when starting from frozen. Ensure the brisket is well-sealed before freezing to prevent ice crystals from forming inside the bag.
Q: Do I need to rest sous vide brisket before finishing?
A: No resting is required between sous vide and finishing since the meat is already at serving temperature. However, rest 10-15 minutes after finishing before slicing.
Q: Can I use the bag juices for anything?
A: The bag liquid contains rendered fat and seasoning. Reduce it by half in a saucepan to concentrate flavors, skim excess fat, and use as a sauce base or au jus.
Q: What if my brisket is too large for my container?
A: Cut the brisket in half and cook both pieces simultaneously, or separate the flat and point and cook separately with adjusted times based on thickness.
Q: How do I know when the bark is done during finishing?
A: Look for a dark mahogany to nearly black color with a dry, crusty texture. The bark should feel firm when tapped with tongs and have visible caramelization.
Q: Can I finish the brisket immediately or do I need to chill it first?
A: You can finish immediately after sous vide for same-day serving, or use the ice bath method to chill and store for later finishing—both methods work equally well.
Our Expertise & Experience
This sous vide beef brisket recipe guide was developed through extensive testing with multiple brisket cuts at varying temperatures and times over several years. Our team has cooked over 50 briskets using sous vide methods, comparing results against traditional smoking techniques to identify optimal approaches for home cooks. We tested equipment from budget to premium categories to provide realistic recommendations for various budgets and cooking frequencies. All temperature and timing guidelines reflect actual measured results rather than theoretical estimates, ensuring you achieve consistent, restaurant-quality brisket in your own kitchen.
Read More
Beef Sirloin Steak Sous Vide: Perfect Results Every Time
Learn exact temperatures and timing for restaurant-quality sirloin with edge-to-edge perfection
How to Cook Sous Vide Ribeye Steak Like a Steakhouse
Comprehensive guide covering temperature selection and professional searing methods
Cooking Sous Vide Flank Steak: Expert Tips and Tricks
Transform tough cuts with optimal temperatures and marinading techniques
8 Smart Kitchen Tools for Healthier Cooking Made Easy
Essential smart gadgets including immersion circulators and digital thermometers